Assignments
Please finish below assignment before due date
- Introduction to Git Due by 9/12/21
Clean up and start new
Before we start other session, let’s clean up folders
$ cd ~/
$ ls
Please do it first and check the solution below.
Clean the folder with contents
How can we clean up
bch709_testHello?rm -R <folder name>
Downloading file
Let’s downloading one file from website. There are several command to download file. Such as ‘wget’,’curl’,’rsync’ etcs. but this time we will use
curl. File locationhttps://raw.githubusercontent.com/plantgenomicslab/BCH709/6055e8c5faf400119dc78b4d36f6b93814d9f76d/bch709_student.txtHow to use curl?
How to download from web file?
curl -L -o <output_name> <link>curl -L -o bch709_student.txt https://raw.githubusercontent.com/plantgenomicslab/BCH709/6055e8c5faf400119dc78b4d36f6b93814d9f76d/bch709_student.txt ls bch709_student.txt

Viewing file contents
There are various commands to print the contents of the file in bash. Most of these commands are often used in specific contexts. All these commands when executed with filenames displays the contents on the screen. Most common ones are less, more, cat, head and tail.
lessFILENAME try this:less bch709_student.txtDisplays file contents on the screen with line scrolling (to scroll you can use arrow keys, PgUp/PgDn keys, space bar or Enter key). When you are done press q to exit.
moreFILENAME try this:more bch709_student.txtLike less command, also, displays file contents on the screen with line scrolling but uses only space bar or Enter key to scroll. When you are done press q to exit.
catFILENAME try this:cat bch709_student.txtSimplest form of displaying contents. It catalogs the entire contents of the file on the screen. In case of large files, entire file will scroll on the screen without pausing
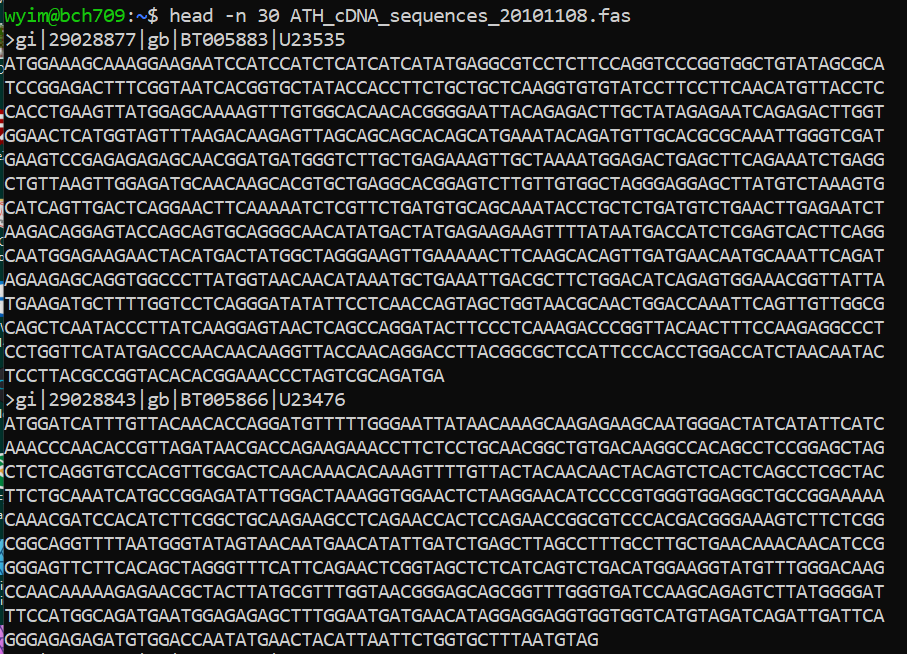
headFILENAME try this:head bch709_student.txtDisplays only the starting lines of a file. The default is first ten lines. But, any number of lines can be displayed using –n option (followed by required number of lines).
tailFILENAME try this:tail bch709_student.txtSimilarto head, but displays the last 10 lines. Again –n option can be used to change this. More information about any of these commands can be found in man pages (man command)
Let’s Download bigger data
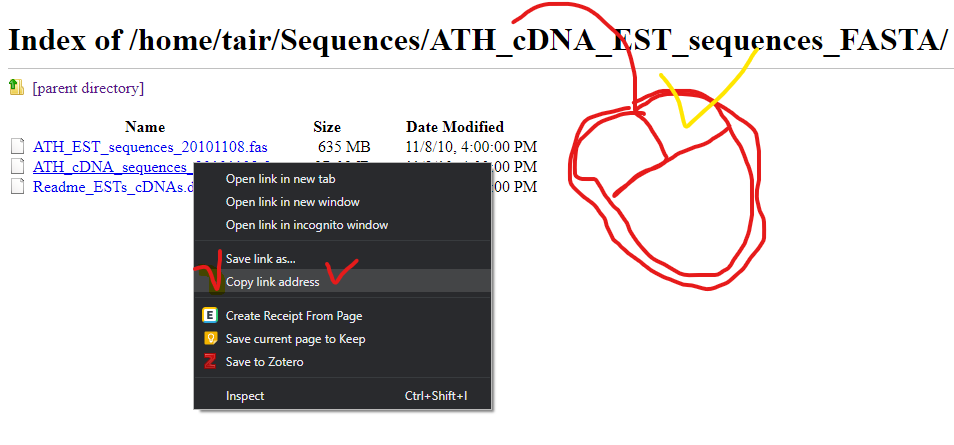
Please go to below wesite.
ftp://ftp.arabidopsis.org/home/tair/Sequences/ATH_cDNA_EST_sequences_FASTA/Please download yellow marked file.
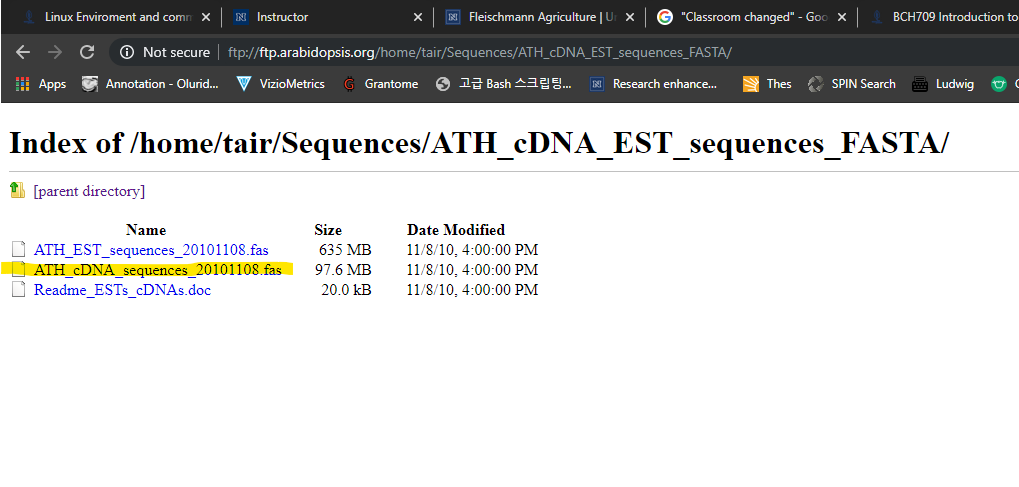
How to download
curl -L -O ftp://ftp.arabidopsis.org/home/tair/Sequences/ATH_cDNA_EST_sequences_FASTA/ATH_cDNA_sequences_20101108.fas
Viewing file contents
What is the difference in
less,tail,moreandhead?
What are flags (parameters / options)?
A “flag” in Unix terminology is a parameter added to the command. See for example
$ lsversus
$ ls -lTypically flags make programs behave differently or report their information in different ways.
How to find out what flags are available?
You can use the manual to learn more about a command:
$ man lswill produce
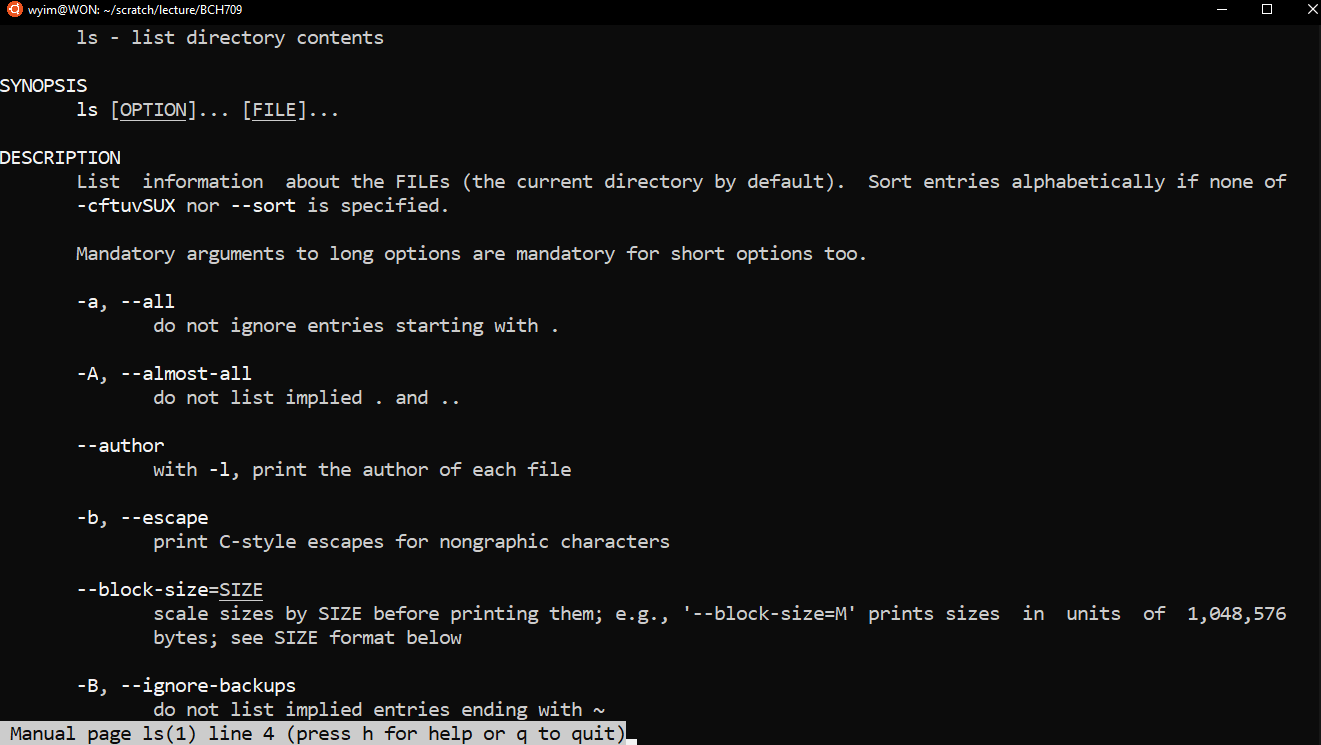
What if the tools does not have manual page?
Only tools that come with Unix will have a manual. For other software the -h, -help or –help command will typically print instructions for their use.
$ curl --helpIf the help flag is not recognized you will need to find the manual for the software.
What are flag formats?
Traditionally Unix tools use two flag forms:
short form: single minus - then one letter, like -o, ’-L‘
long form: double minus – then a word, like –output, –Location In each case the parameter may stand alone as a toggle (on/off) or may take additional values after the flag. -o
or -L Now some bioinformatics tools do not follow this tradition and use a single - character for both short and long options. -g and -genome. **Using flags is a essential to using Unix. Bioinformatics tools typically take a large number of parameters specified *via* flags**. The correctness of the results critically depends on the proper use of these parameters and flags.
How many lines does the file have?
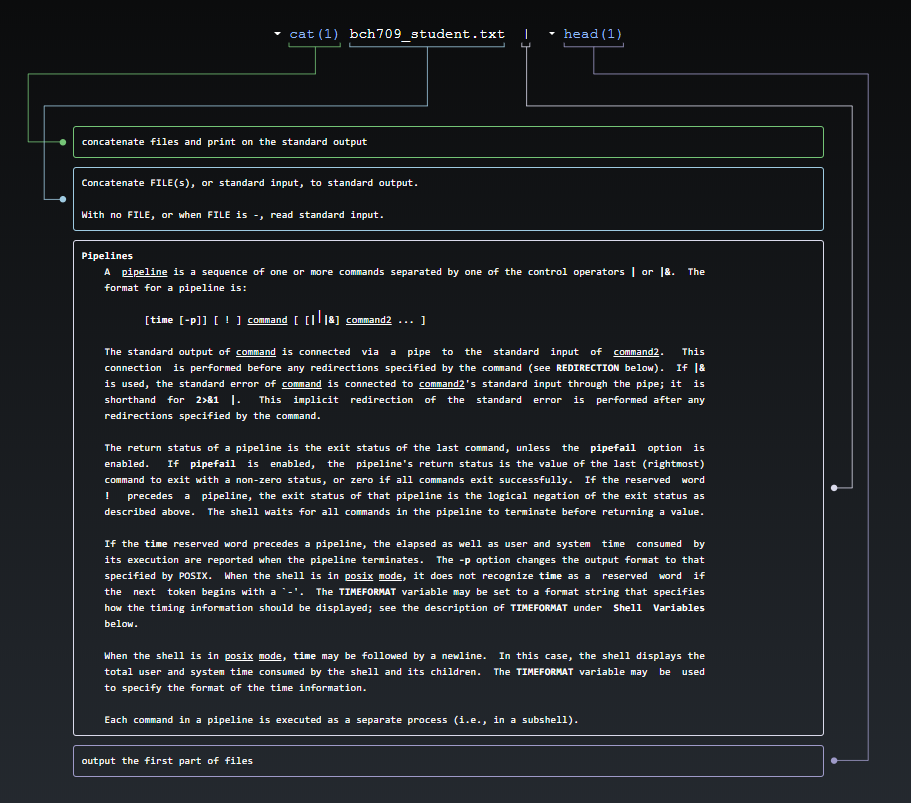
You can pipe the output of you stream into another program rather than the screen. Use the | (Vertical Bar) character to connect the programs. For example, the wc program is the word counter.
cat bch709_student.txt | wcprints the number of lines, words, and characters in the stream:
41 141 900How many lines?
cat bch709_student.txt | wc -l41of course we can use
wcdirectlywc -l bch709_student.txtThat is equivalent to:
cat bch709_student.txt | wc -lIn general, it is a better option to open a stream with cat then pipe the flow into the next program. Later you will see that it is easier to design, build and understand more complex pipelines when the data stream is opened at the beginning as a separate step.
Again, let’s do head.
cat bch709_student.txt | head
is this equivalent to?
head bch709_student.txt
grep
Globally search a Regular Expression and Print is one of the most useful commands in UNIX and it is commonly used to filter a file/input, line by line, against a pattern eg., to print each line of a file which contains a match for pattern. Please check option with :
grep --helpWith options, syntax is
grep [OPTIONS] PATTERN FILENAMELet’s find how many people use macOS? First we need to check file.
$ wc -l bch709_student.txt$ less bch709_student.txtHow can we find the macOS people? Now we can use
grep$ cat bch709_student.txt | grep MacOSHow can we count?
$ cat bch709_student.txt | grep MacOS | wc -lHow about this?
$ grep MacOS bch709_student.txt | wc -lHow about this?
$ grep -c MacOS bch709_student.txtWith other options (flags)
$ grep -v Windows bch709_student.txtWith multiple options (flags)
$ grep -c -v Windows bch709_student.txt$ grep --color -i macos bch709_student.txt
How do I store the results in a new file?
The > character is the redirection.
$ grep -i macos bch709_student.txt > mac_student$ cat bch709_student.txt | grep -i windows > windows_studentPlease check with
catorless
Do you want to check difference?
$ diff mac_student windows_student$ diff -y mac_student windows_student
How can I select name only? (cut)
$ cat bch709_student.txt | cut -f 1$ cut -f 1 bch709_student.txt
How can I sort it ? (sort)
cut -f 1 bch709_student.txt | sort$ sort bch709_student.txt $ sort -k 2 bch709_student.txt $ sort -k 1 bch709_student.txt$ sort -k 1 bch709_student.txt | cut -f 1Save?
sort -k 1 bch709_student.txt | cut -f 1 > name_sort
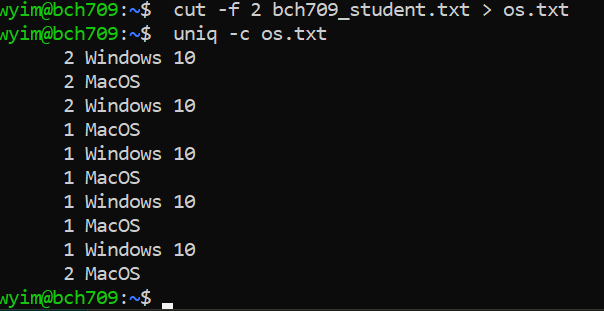
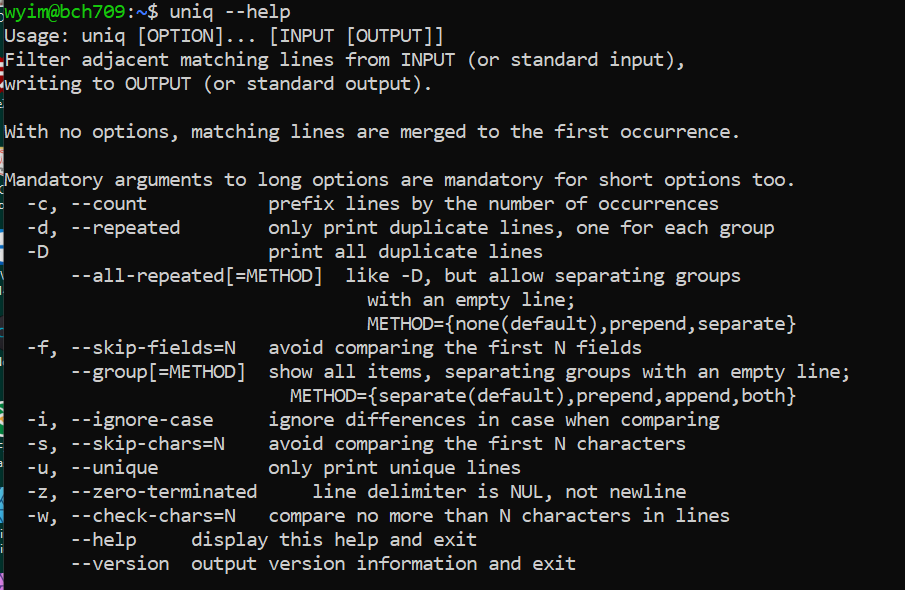
uniq
uniq command removes duplicate lines from a sorted file, retaining only one instance of the running matching lines. Optionally, it can show only lines that appear exactly once, or lines that appear more than once. uniq requires sorted input since it compares only consecutive lines.
$ cut -f 2 bch709_student.txt > os.txt$ uniq -c os.txt
$ sort os.txt | uniq -c
Of course you can use
sortindependently.$ sort os.txt > os_sort.txt $ uniq -c os_sort.txt$ uniq --help
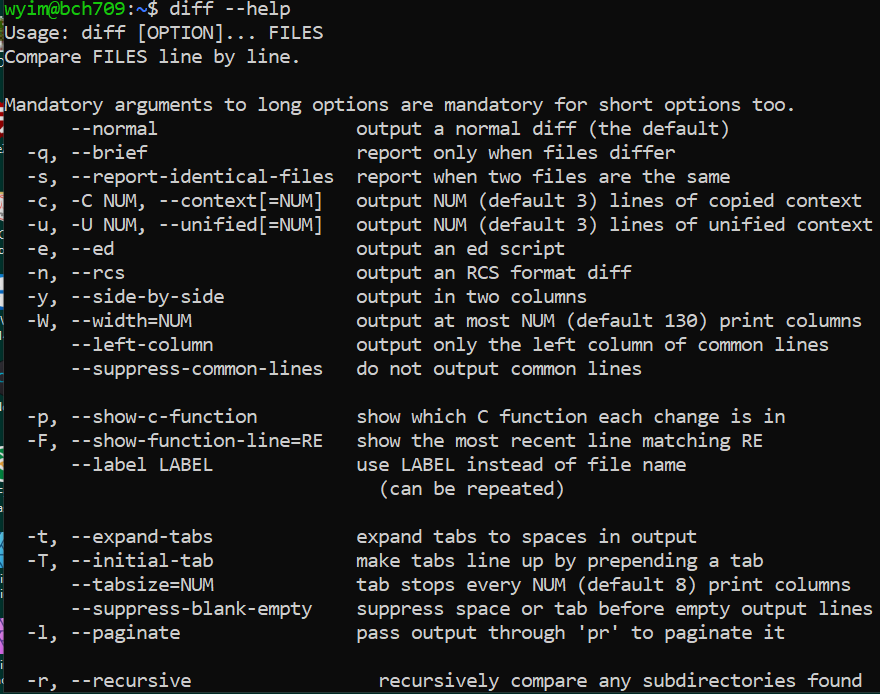
diff
diff (difference) reports differences between files. A simple example for diff usage would be ` $ diff FILEA FILEB ` When you try to use new command, please check with
--help.$ diff os.txt os_sort.txt$ diff -y os.txt os_sort.txt$ sort os.txt | diff -y - os_sort.txt
There are still a lot of command that you can use. Such as paste, comm, join, split etc.
One liners
Oneliner, textual input to the command-line of an operating system shell that performs some function in just one line of input. This need to be done with “|”. For advanced usage, please check this
FASTA format
The original FASTA/Pearson format is described in the documentation for the FASTA suite of programs. It can be downloaded with any free distribution of FASTA (see fasta20.doc, fastaVN.doc or fastaVN.me—where VN is the Version Number).
The first line in a FASTA file started either with a “>” (greater-than; Right angle braket) symbol or, less frequently, a “;” (semicolon) was taken as a comment. Subsequent lines starting with a semicolon would be ignored by software. Since the only comment used was the first, it quickly became used to hold a summary description of the sequence, often starting with a unique library accession number, and with time it has become commonplace to always use “>” for the first line and to not use “;” comments (which would otherwise be ignored).
Following the initial line (used for a unique description of the sequence) is the actual sequence itself in standard one-letter character string. Anything other than a valid character would be ignored (including spaces, tabulators, asterisks, etc…). Originally it was also common to end the sequence with an “*” (asterisk) character (in analogy with use in PIR formatted sequences) and, for the same reason, to leave a blank line between the description and the sequence.
Description line
The description line (defline) or header/identifier line, which begins with ‘>’, gives a name and/or a unique identifier for the sequence, and may also contain additional information. In a deprecated practice, the header line sometimes contained more than one header, separated by a ^A (Control-A) character. In the original Pearson FASTA format, one or more comments, distinguished by a semi-colon at the beginning of the line, may occur after the header. Some databases and bioinformatics applications do not recognize these comments and follow the NCBI FASTA specification.
FASTA file handling with command line.
Please check one fasta file
$ ls ATH_cDNA_sequences_20101108.fas
previous example
curl -L -O ftp://ftp.arabidopsis.org/home/tair/Sequences/ATH_cDNA_EST_sequences_FASTA/ATH_cDNA_sequences_20101108.fas
count cDNA
How many cDNA in this fasta file?
Please use grep wc to find number.
fasta count

count DNA letter
How many sequences (DNA letter) in this fasta file? Please use
grepwcto find number.
what is GI and GB?
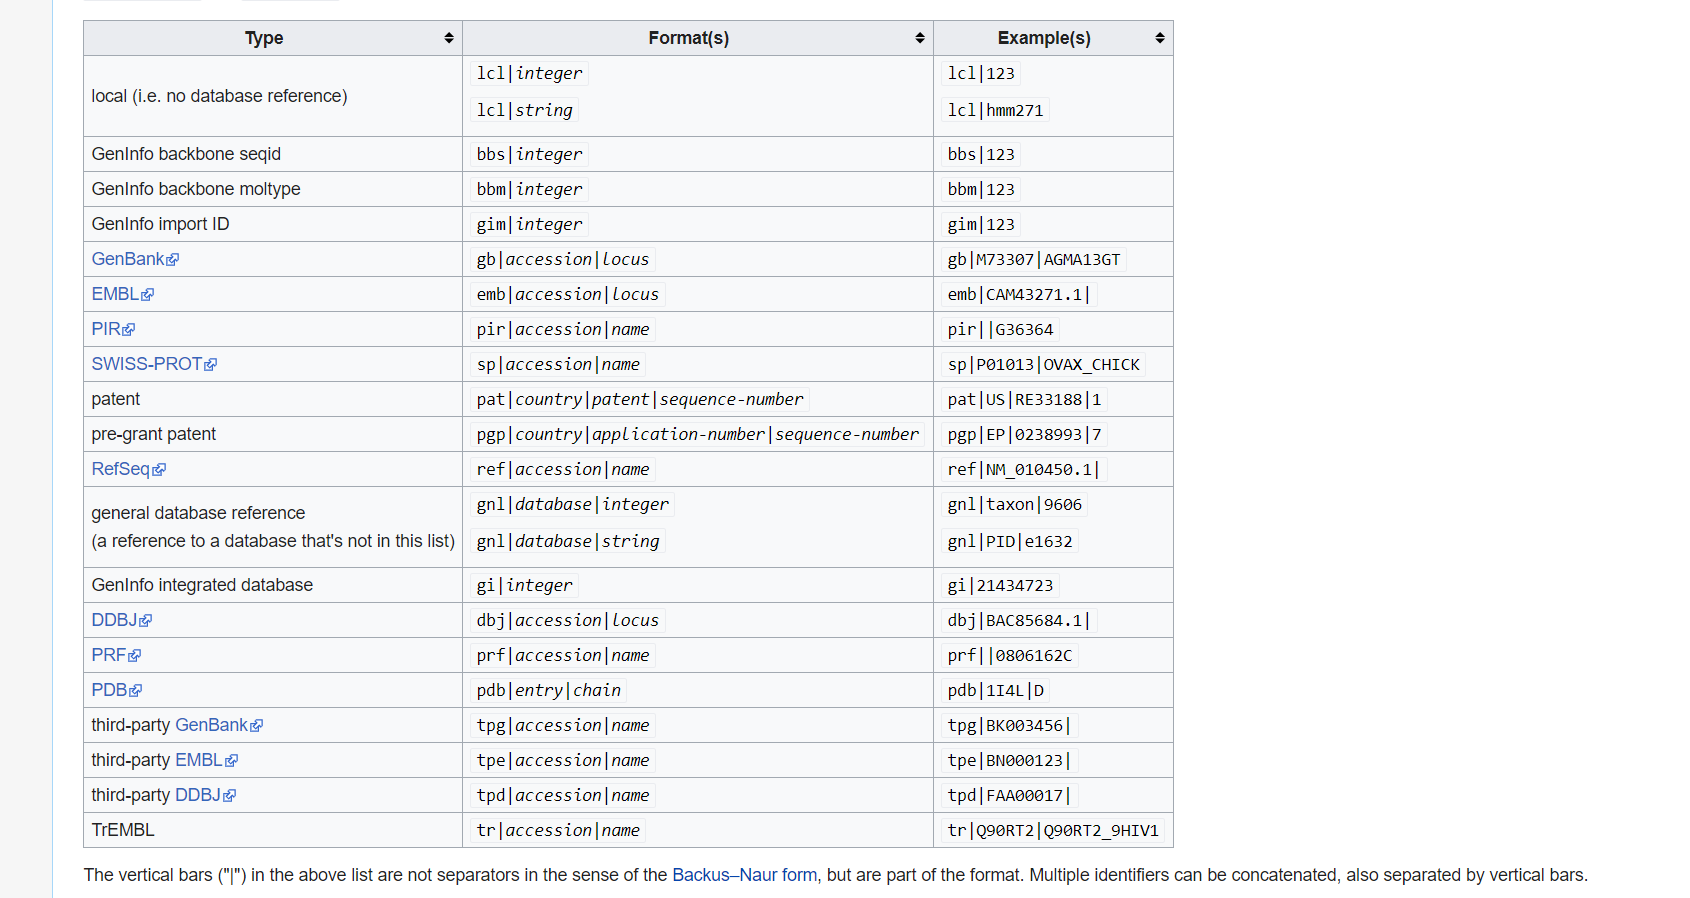
Collect GI
How can I collect GI from FASTA description line?
Please use grep cut to find number.
Sequence redundancy
Does GI have any redundancy? Please use
grepwcdiffto solve.
GFF file
The GFF (General Feature Format) format consists of one line per feature, each containing 9 columns of data, plus optional track definition lines. The following documentation is based on the Version 3 (http://gmod.org/wiki/GFF3) specifications.
Please download below file
http://www.informatics.jax.org/downloads/mgigff3/MGI.gff3.gz
What is .gz ?
file MGI.gff3.gz
Compression
There are several options for archiving and compressing groups of files or directories. Compressed files are not only easier to handle (copy/move) but also occupy less size on the disk (less than 1/3 of the original size). In Linux systems you can use zip, tar or gz for archiving and compressing files/directories.
ZIP compression/extraction
zip OUTFILE.zip INFILE.txt ## Compress INFILE.txt
zip -r OUTDIR.zip DIRECTORY ## Compress all files in a DIRECTORY into one archive file (OUTDIR.zip)
zip -r OUTFILE.zip . -i \*.txt ## Compress all txt files in a DIRECTORY into one archive file (OUTFILE.zip)
unzip SOMEFILE.zip  ## Decompress
TAR compression/extraction
tar (tape archive) utility saves many files together into a single archive file, and restores individual files from the archive. It also includes automatic archive compression/decompression options and special features for incremental and full backups.
tar -xzvf SOMEFILE.tar.gz # extract contents of SOMEFILE.tar
tar -czvf OUTFILE.tar.gz DIRECTORY #extract contents of gzipped archive SOMEFILE.tar.gz
tar -czvf OUTFILE.tar.gz \*.txt #archive and compress all files in a directory into one archive file
tar -czvf backup.tar.gz BACKUP_WORKSHOP #archive and compress all ".txt" files in current directory into one archive file
Gzip compression/extraction
gzip (gnu zip) compression utility designed as a replacement for compress, with much better compression >and no patented algorithms. The standard compression system for all GNU software. gzip SOMEFILE compress SOMEFILE (also removes uncompressed file) gunzip SOMEFILE.gz uncompress SOMEFILE.gz (also removes compressed file)
gzip the file MGI.gff3.gz and examine the size. gunzip it back so that you can use this file for thelater exercises.
$ gunzip MGI.gff3.gz
$ ls –lh
$ gzip MGI.gff3
$ ls -lh
$ gunzip MGI.gff3.gz
GFF3 Annotations
Print all sequences annotated in a GFF3 file.
cut -s -f 1,9 MGI.gff3 | grep $'\t' | cut -f 1 | sort | uniq
Determine all feature types annotated in a GFF3 file.
grep -v '^#' MGI.gff3 | cut -s -f 3 | sort | uniq
Determine the number of genes annotated in a GFF3 file.
grep -c $'\tgene\t' MGI.gff3
Extract all gene IDs from a GFF3 file.
grep $'\tgene\t' MGI.gff3 | perl -ne '/ID=([^;]+)/ and printf("%s\n", $1)'
Print all CDS.
cat MGI.gff3 | cut -f 3 | grep CDS |
Print CDS and ID
    cat MGI.gff3 | cut -f 1,3,4,5,7,9 | head
    cat MGI.gff3 | cut -f 1,3,4,5,7,9 | grep CDS | head
    cat MGI.gff3 | cut -f 1,3,4,5,7,9 | grep CDS | sed 's/;.*//g' | head
    cat MGI.gff3 | cut -f 1,3,4,5,7,9 | grep CDS | sed 's/;.*//g' | sed 's/ID=//g' | head
    cat MGI.gff3 | cut -f 1,3,4,5,7,9 | grep $'\tCDS\t' | sed 's/;.*//g' | sed 's/ID=//g' | head
Print length of each gene in a GFF3 file.
grep $'\tgene\t' MGI.gff3 | cut -s -f 4,5 | perl -ne '@v = split(/\t/); printf("%d\n", $v[1] - $v[0] + 1)'
Extract all gene IDs from a GFF3 file.
grep $'\tgene\t' MGI.gff3 | perl -ne '/ID=([^;]+)/ and printf("%s\n", $1)'
Time and again we are surprised by just how many applications it has, and how frequently problems can be solved by sorting, collapsing identical values, then resorting by the collapsed counts. The skill of using Unix is not just that of understanding the commands themselves. It is more about recognizing when a pattern, such as the one that we show above, is the solution to the problem that you wish to solve. The easiest way to learn to apply these patterns is by looking at how others solve problems, then adapting it to your needs.
This manual was adapted from Linode. Linode is the BEST knowledge site ever.
, a tutorial that teaches you how to work at the command-line. You’ll learn all the basic skills needed to start being productive in the UNIX terminal.
This manual was adapted from Linode. Linode is the BEST knowledge site ever.
A tutorial that teaches you how to work at the command-line. You’ll learn all the basic skills needed to start being productive in the UNIX terminal.
Basic commands
| Category | comnmand |
|---|---|
| Navigation | cd, ls, pwd |
| File creation | touch,nano,mkdir,cp,mv,rm,rmdir |
| Reading | more,less,head,tail,cat |
| Compression | zip,gzip,bzip2,tar,compress |
| Uncompression | unzip,gunzip,bunzip2,uncompress |
| Permissions | chmod |
| Help | man |
There are still a lot of command that you can use. Such as paste, comm, join, split etc.
Quick reminder
-
Learn basic Bash. Actually, type
man bashand at least skim the whole thing; it’s pretty easy to follow and not that long. Alternate shells can be nice, but Bash is powerful and always available (learning only zsh, fish, etc., while tempting on your own laptop, restricts you in many situations, such as using existing servers). -
Learn at least one text-based editor well. The
nanoeditor is one of the simplest for basic editing (opening, editing, saving, searching). However, for the power user in a text terminal, there is no substitute for Vim (vi), the hard-to-learn but venerable, fast, and full-featured editor. Many people also use the classic Emacs, particularly for larger editing tasks. (Of course, any modern software developer working on an extensive project is unlikely to use only a pure text-based editor and should also be familiar with modern graphical IDEs and tools.) - Finding documentation:
- Know how to read official documentation with
man(for the inquisitive,man manlists the section numbers, e.g. 1 is “regular” commands, 5 is files/conventions, and 8 are for administration). Find man pages withapropos. - Know that some commands are not executables, but Bash builtins, and that you can get help on them with
helpandhelp -d. You can find out whether a command is an executable, shell builtin or an alias by usingtype command. curl cheat.sh/commandwill give a brief “cheat sheet” with common examples of how to use a shell command.
- Know how to read official documentation with
-
Learn about redirection of output and input using
>and<and pipes using|. Know>overwrites the output file and>>appends. Learn about stdout and stderr. -
Basic file management:
lsandls -l(in particular, learn what every column inls -lmeans),less,head,tailandtail -f(or even better,less +F),lnandln -s(learn the differences and advantages of hard versus soft links),chown,chmod,du(for a quick summary of disk usage:du -hs *). For filesystem management,df,mount,fdisk,mkfs,lsblk. Learn what an inode is (ls -iordf -i). - Know regular expressions well, and the various flags to
grep/egrep. The-i,-o,-v,-A,-B, and-Coptions are worth knowing.
Everyday use
-
In Bash, use Tab to complete arguments or list all available commands and ctrl-r to search through command history (after pressing, type to search, press ctrl-r repeatedly to cycle through more matches, press Enter to execute the found command, or hit the right arrow to put the result in the current line to allow editing).
-
Use
aliasto create shortcuts for commonly used commands. For example,alias ll='ls -latr'creates a new aliasll. -
Save aliases, shell settings, and functions you commonly use in
~/.bashrc, and arrange for login shells to source it. This will make your setup available in all your shell sessions. -
To see recent commands, use
history. Follow with!n(wherenis the command number) to execute again. There are also many abbreviations you can use, the most useful probably being!$for last argument and!!for last command (see “HISTORY EXPANSION” in the man page). However, these are often easily replaced with ctrl-r and alt-..
Obscure but useful
-
expr: perform arithmetic or boolean operations or evaluate regular expressions -
m4: simple macro processor -
yes: print a string a lot -
cal: nice calendar -
env: run a command (useful in scripts) -
printenv: print out environment variables (useful in debugging and scripts) -
look: find English words (or lines in a file) beginning with a string -
cut,pasteandjoin: data manipulation -
fmt: format text paragraphs -
pr: format text into pages/columns -
fold: wrap lines of text -
column: format text fields into aligned, fixed-width columns or tables -
expandandunexpand: convert between tabs and spaces -
nl: add line numbers -
seq: print numbers -
bc: calculator -
factor: factor integers -
gpg: encrypt and sign files -
toe: table of terminfo entries -
nc: network debugging and data transfer -
socat: socket relay and tcp port forwarder (similar tonetcat) -
dd: moving data between files or devices -
file: identify type of a file -
tree: display directories and subdirectories as a nesting tree; likelsbut recursive -
stat: file info -
time: execute and time a command -
timeout: execute a command for specified amount of time and stop the process when the specified amount of time completes. -
lockfile: create semaphore file that can only be removed byrm -f -
logrotate: rotate, compress and mail logs. -
watch: run a command repeatedly, showing results and/or highlighting changes -
when-changed: runs any command you specify whenever it sees file changed. Seeinotifywaitandentras well. -
tac: print files in reverse -
comm: compare sorted files line by line -
strings: extract text from binary files -
tr: character translation or manipulation -
iconvoruconv: conversion for text encodings -
splitandcsplit: splitting files -
sponge: read all input before writing it, useful for reading from then writing to the same file, e.g.,grep -v something some-file | sponge some-file -
units: unit conversions and calculations; converts furlongs per fortnight to twips per blink (see also/usr/share/units/definitions.units) -
apg: generates random passwords -
xz: high-ratio file compression -
ldd: dynamic library info -
nm: symbols from object files -
aborwrk: benchmarking web servers -
strace: system call debugging -
mtr: better traceroute for network debugging -
cssh: visual concurrent shell -
rsync: sync files and folders over SSH or in local file system -
ngrep: grep for the network layer -
hostanddig: DNS lookups -
lsof: process file descriptor and socket info -
dstat: useful system stats -
glances: high level, multi-subsystem overview -
iostat: Disk usage stats -
mpstat: CPU usage stats -
vmstat: Memory usage stats -
htop: improved version of top -
last: login history -
w: who’s logged on -
id: user/group identity info -
sar: historic system stats -
ss: socket statistics -
dmesg: boot and system error messages -
sysctl: view and configure Linux kernel parameters at run time -
hdparm: SATA/ATA disk manipulation/performance -
lsblk: list block devices: a tree view of your disks and disk partitions -
lshw,lscpu,lspci,lsusb,dmidecode: hardware information, including CPU, BIOS, RAID, graphics, devices, etc. -
lsmodandmodinfo: List and show details of kernel modules. -
fortune,ddate, andsl: um, well, it depends on whether you consider steam locomotives and Zippy quotations “useful”
Recent unix command
Modern Unix
bat
A cat clone with syntax highlighting and Git integration.
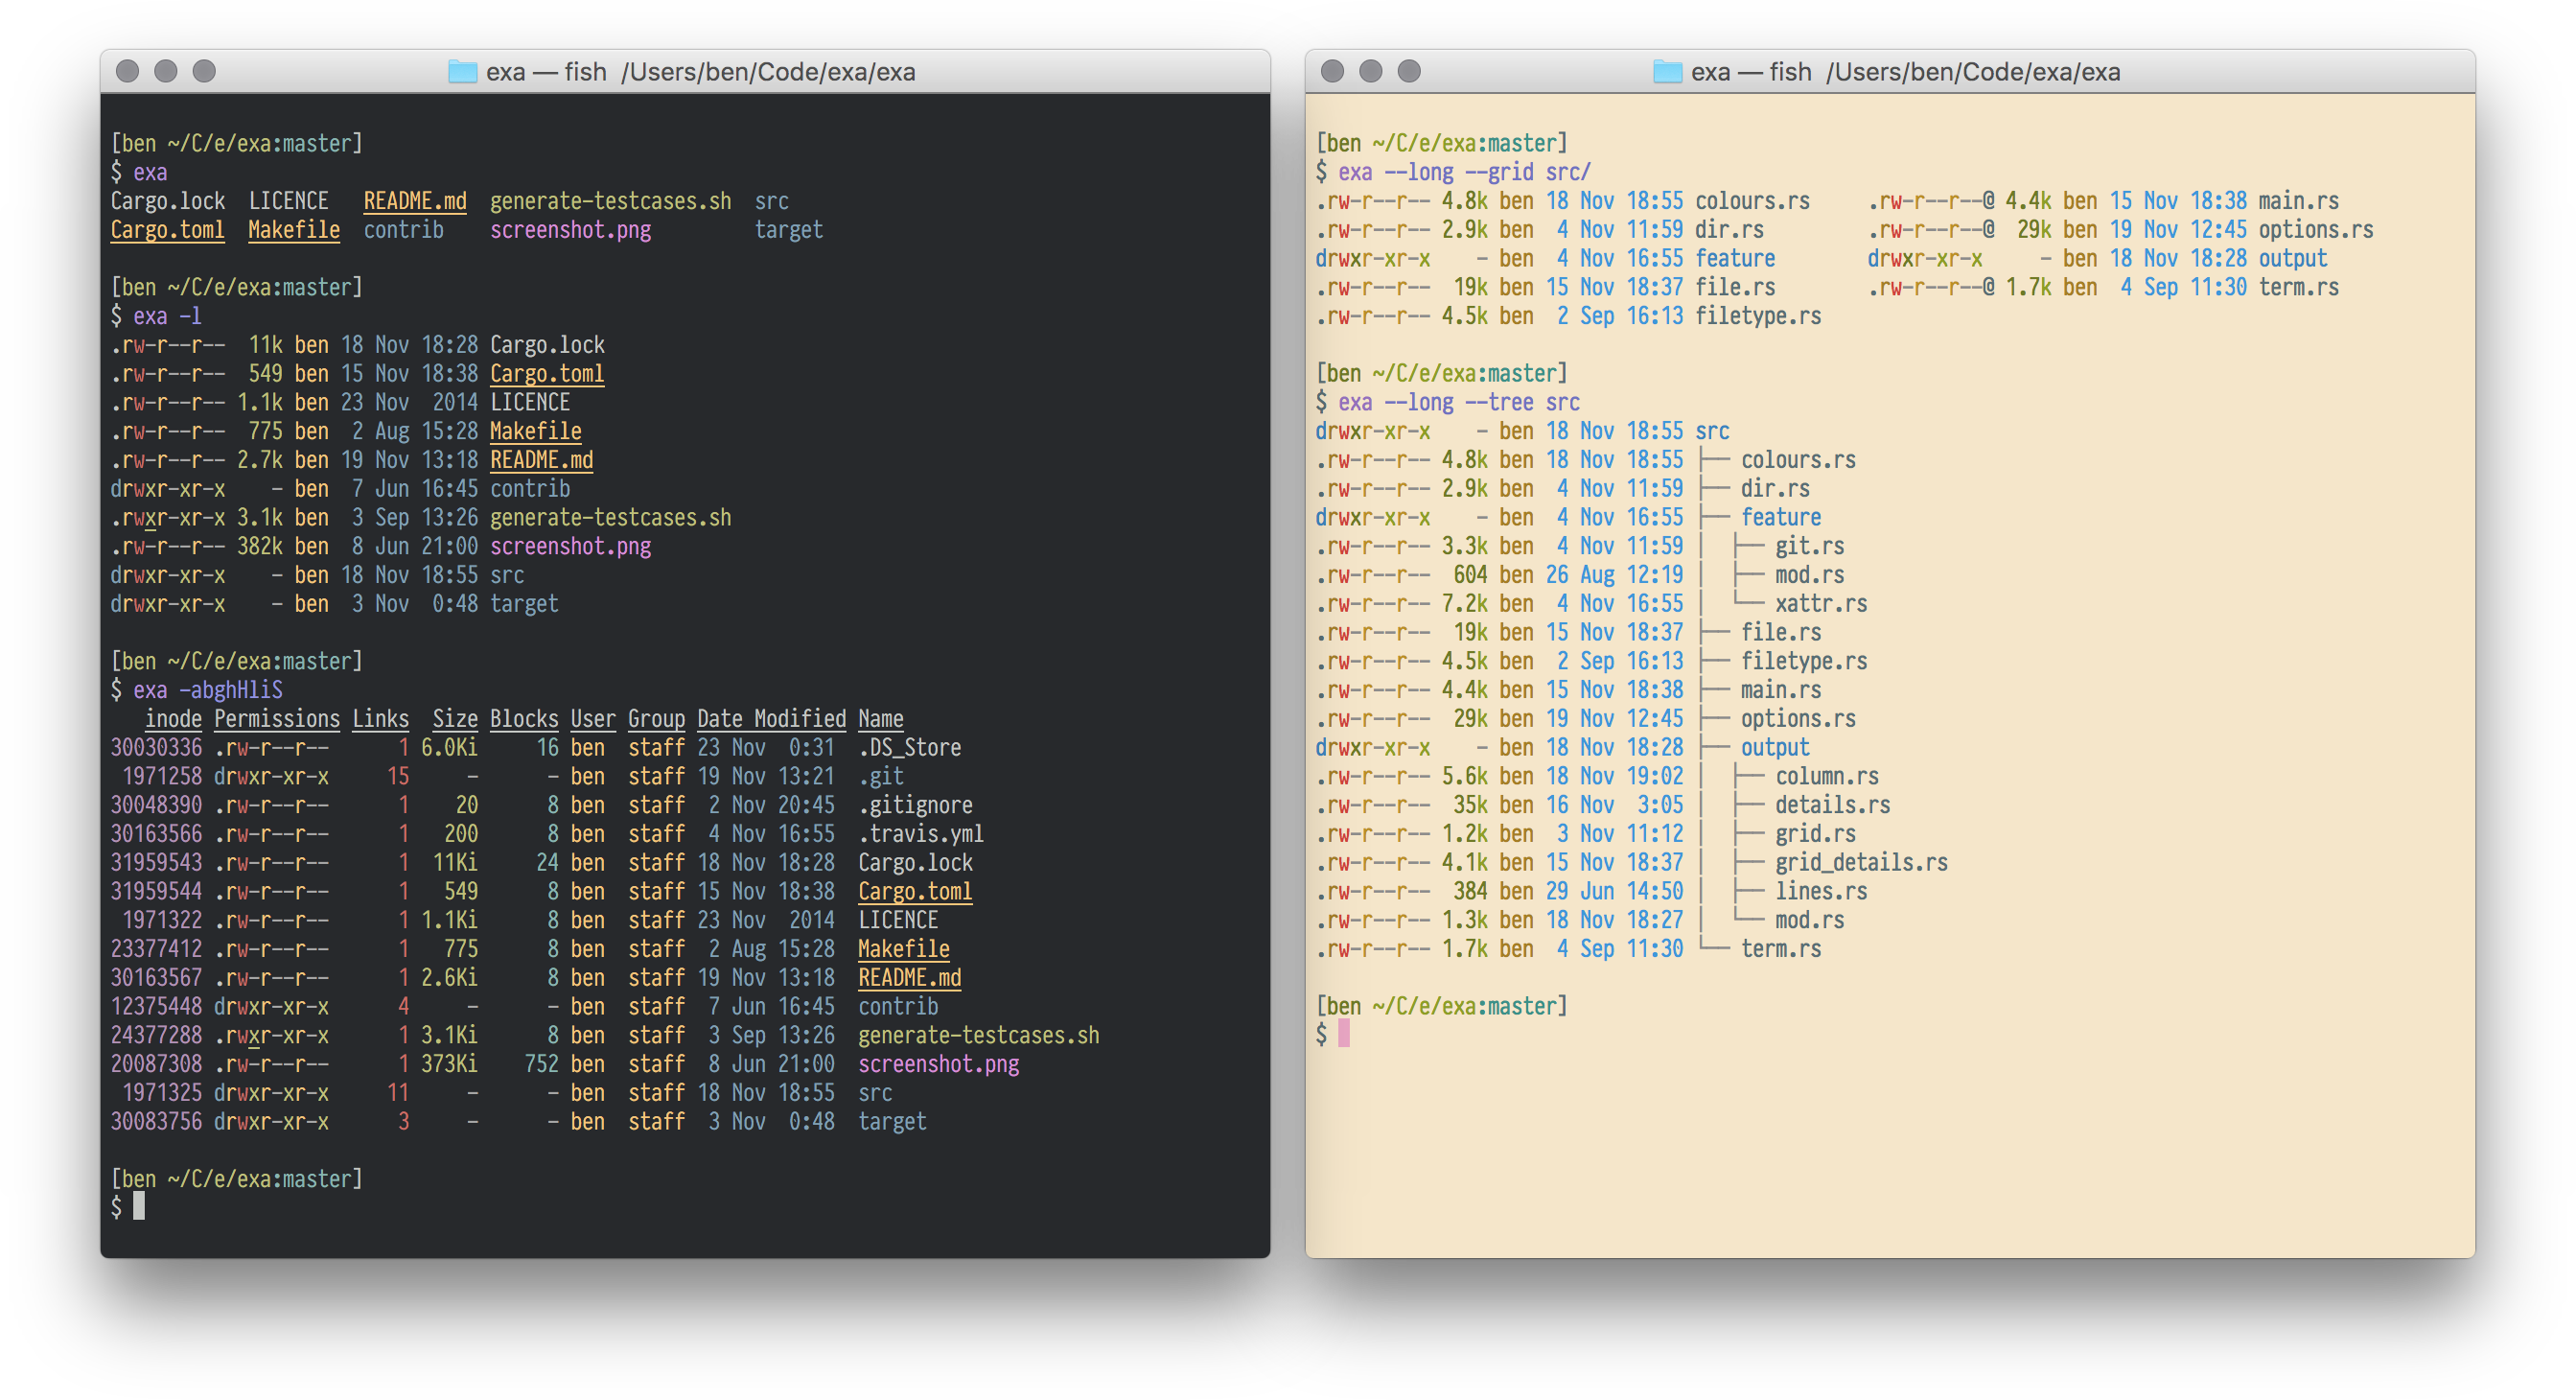
exa
A modern replacement for ls.
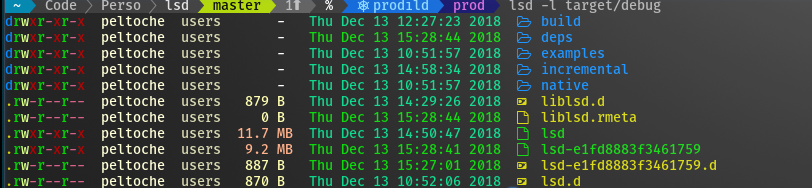
lsd
The next gen file listing command. Backwards compatible with ls.
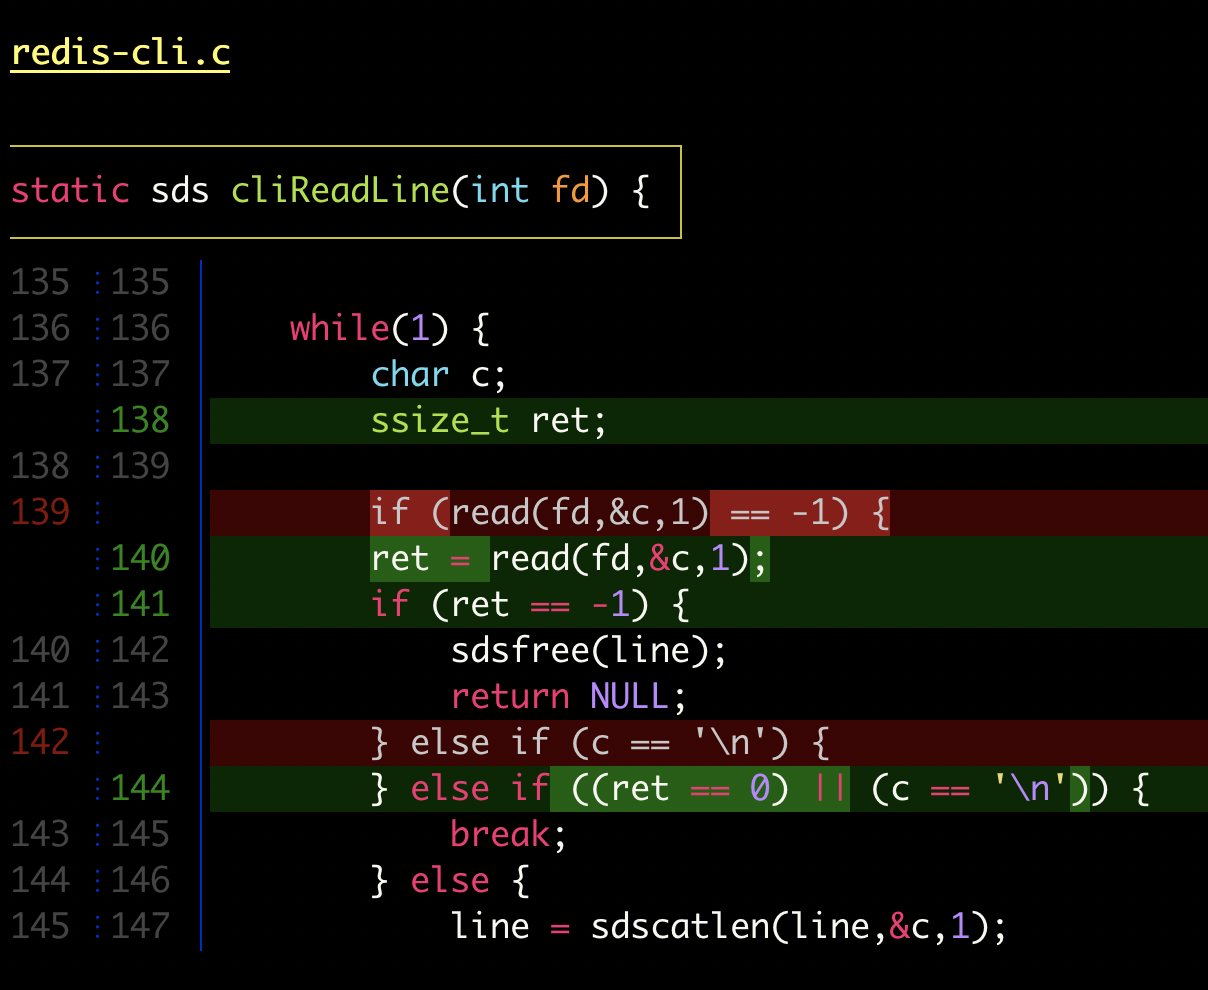
delta
A viewer for git and diff output
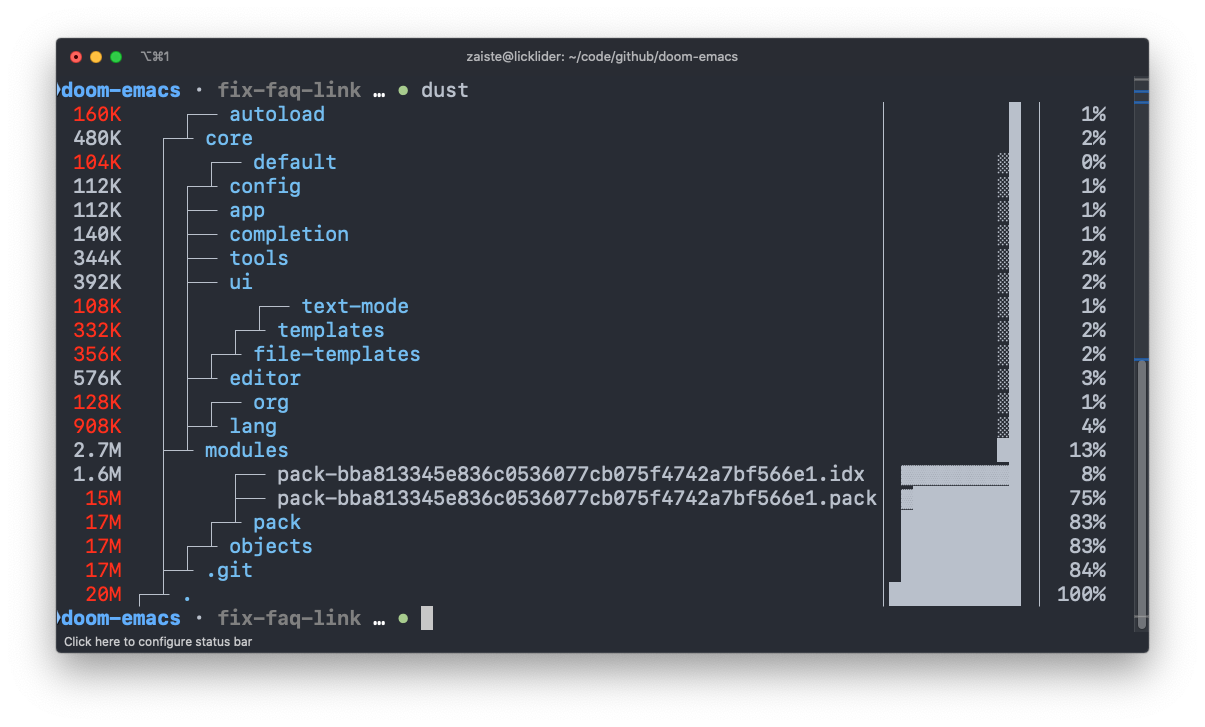
dust
A more intuitive version of du written in rust.
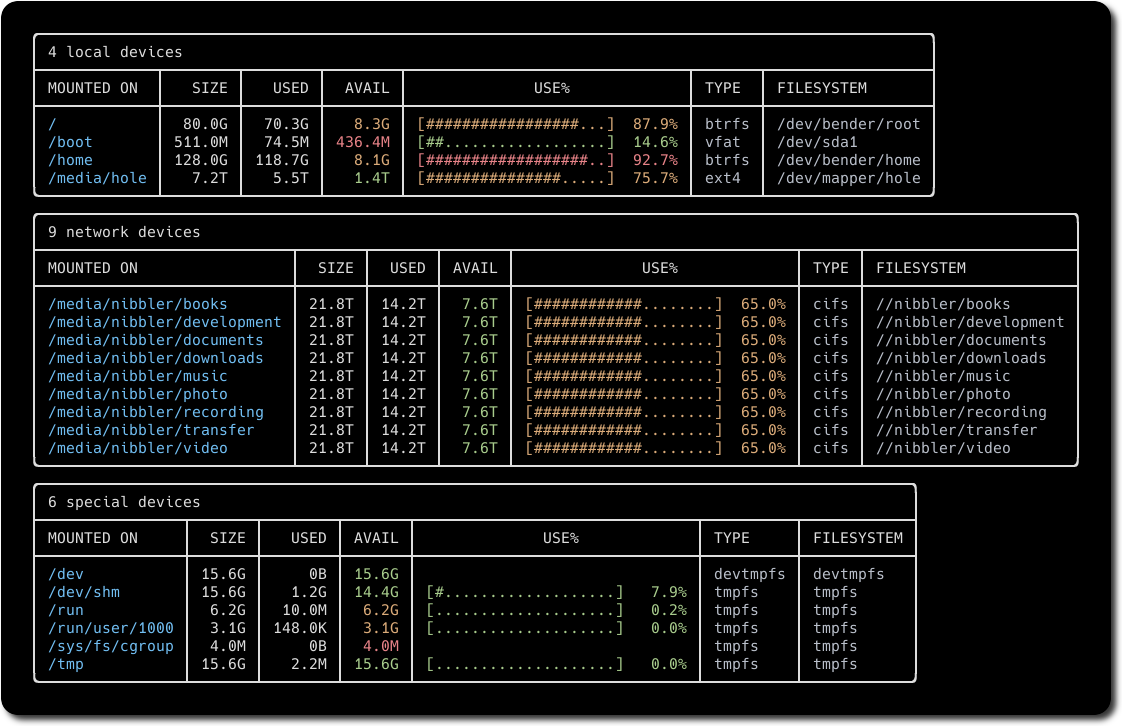
duf
A better df alternative
broot
A new way to see and navigate directory trees

fd
A simple, fast and user-friendly alternative to find.

ripgrep
An extremely fast alternative to grep that respects your gitignore
ag
A code searching tool similar to ack, but faster.

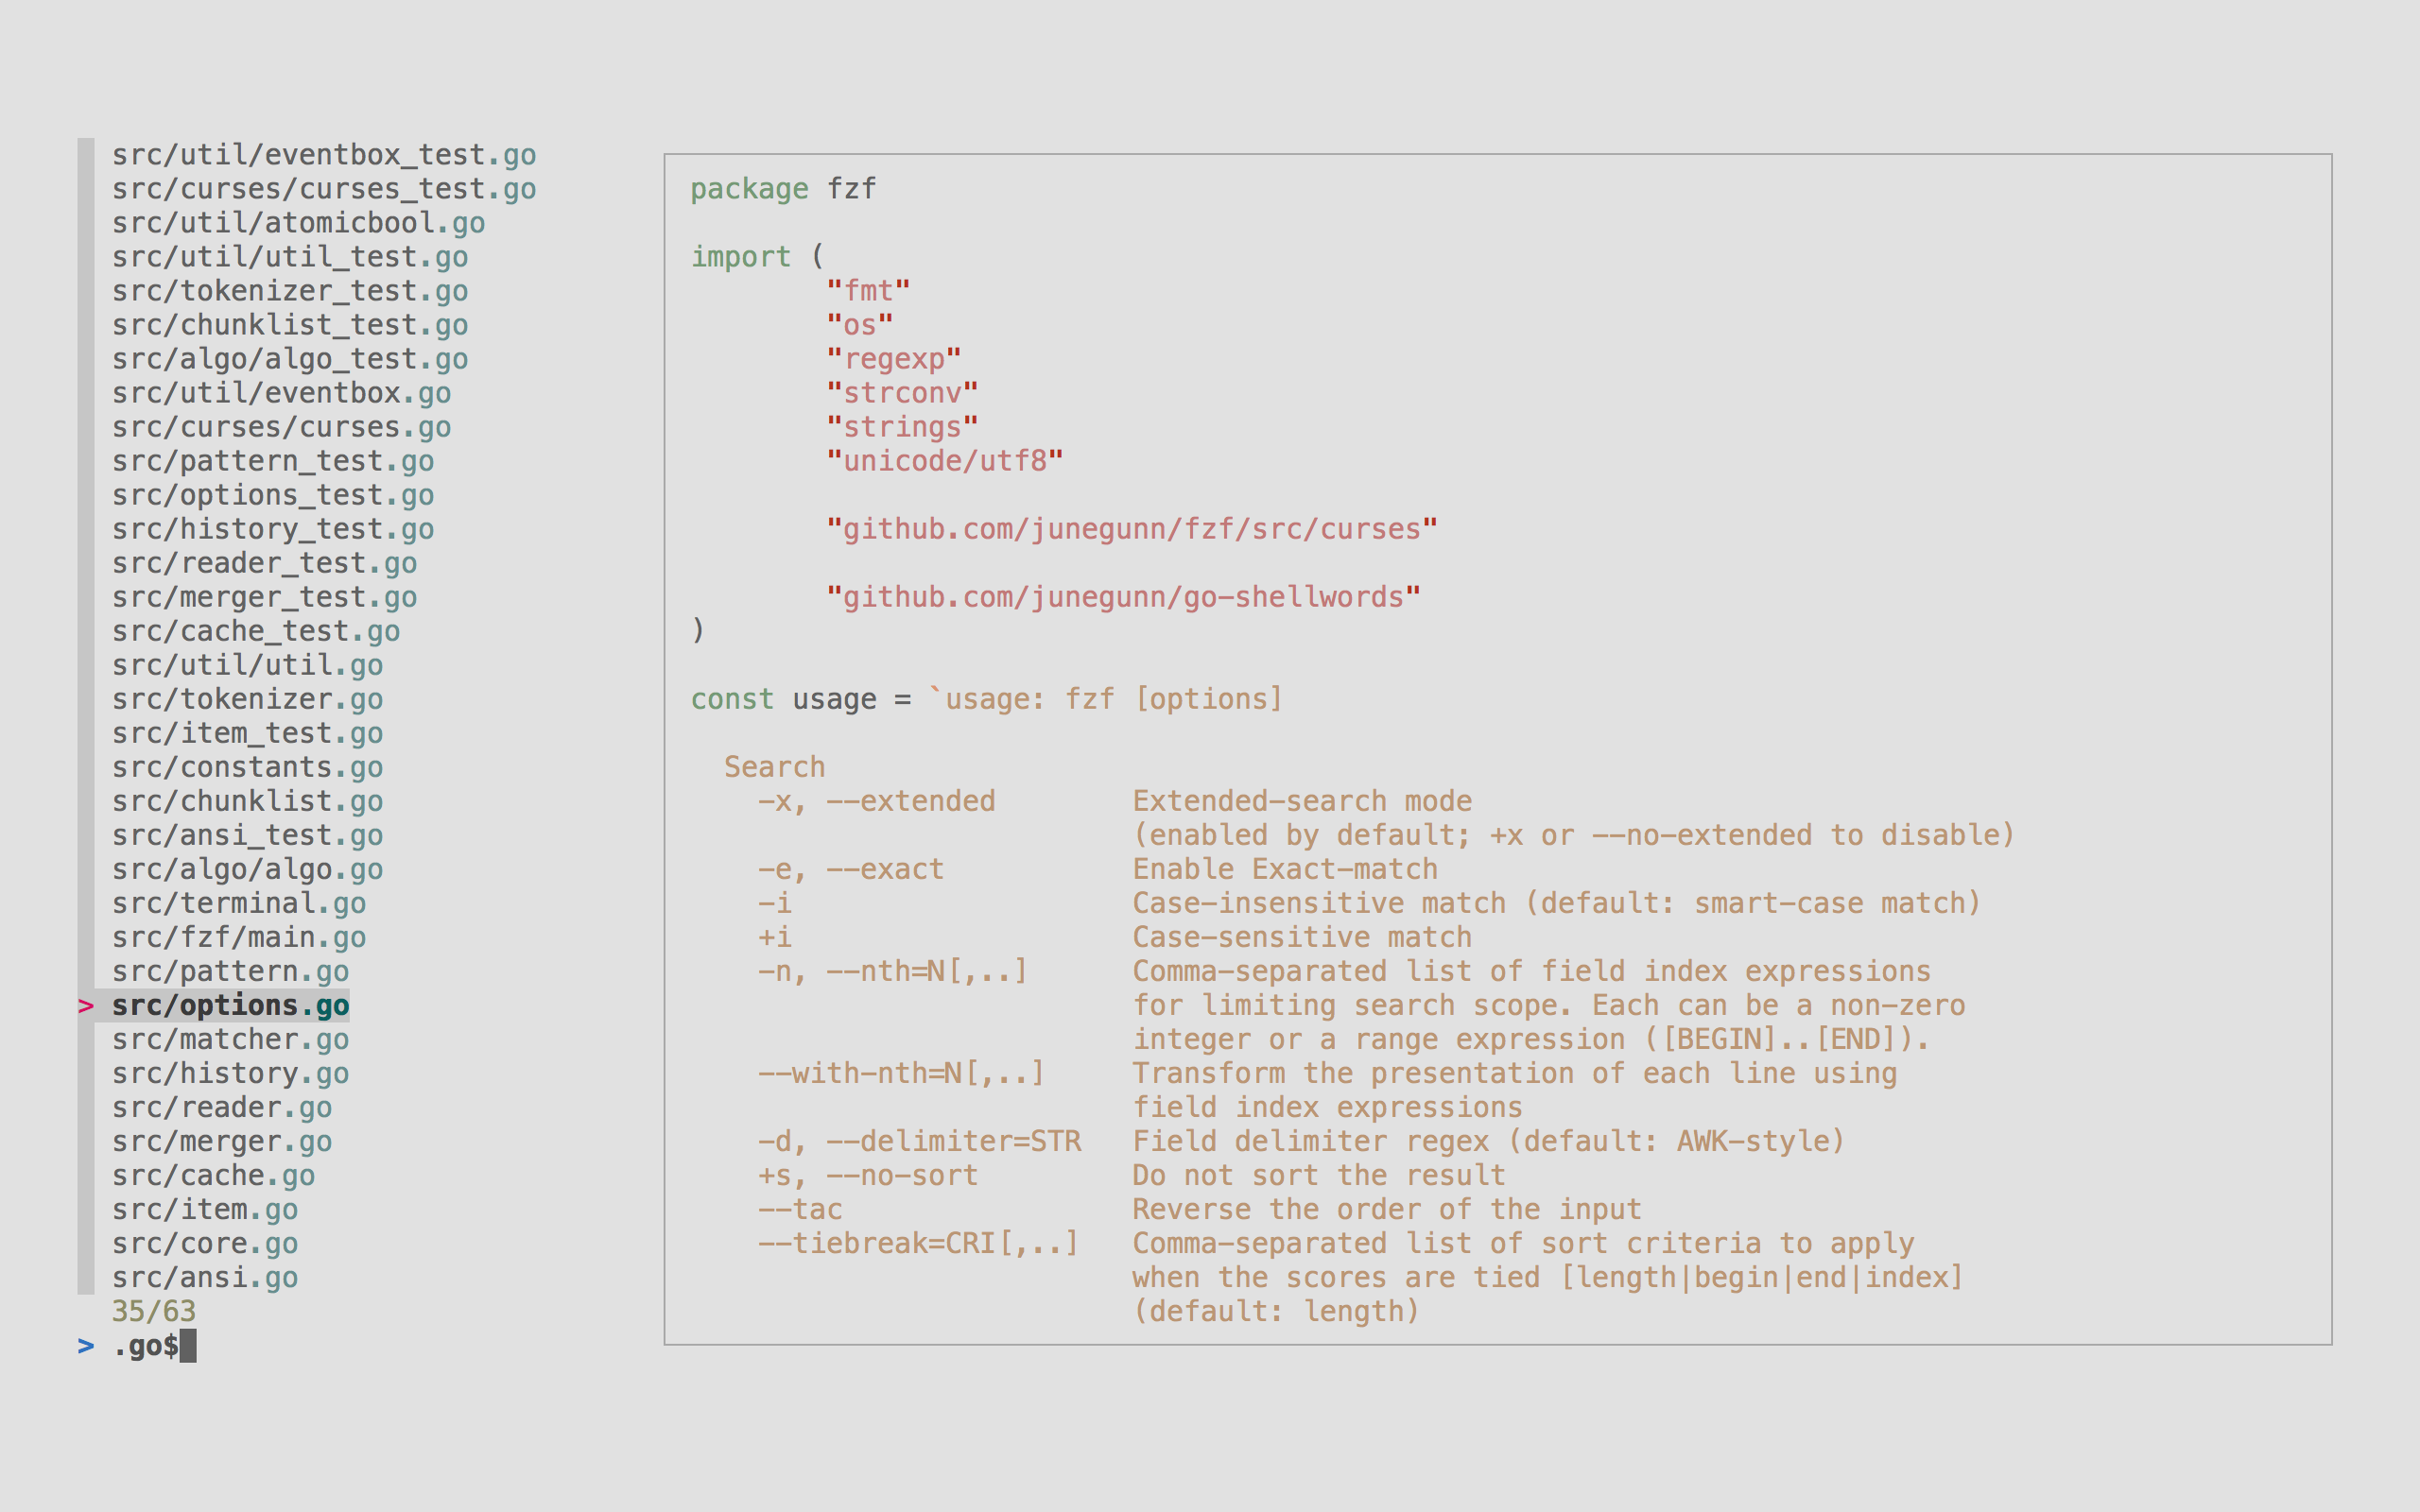
fzf
A general purpose command-line fuzzy finder.
mcfly
Fly through your shell history. Great Scott!

choose
A human-friendly and fast alternative to cut and (sometimes) awk

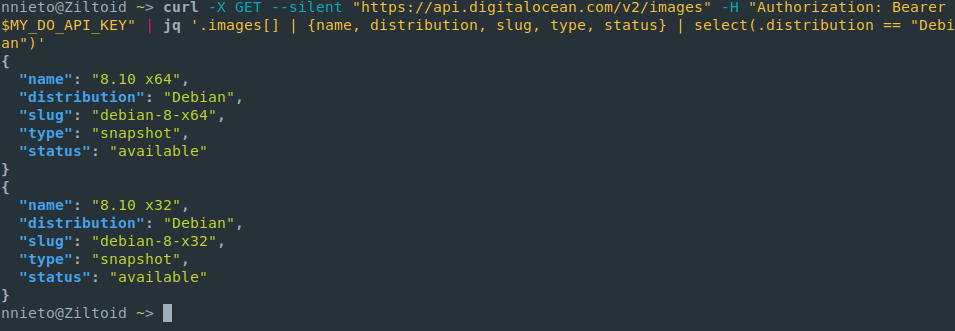
jq
sed for JSON data.
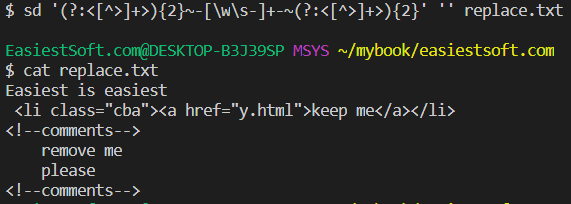
sd
An intuitive find & replace CLI (sed alternative).
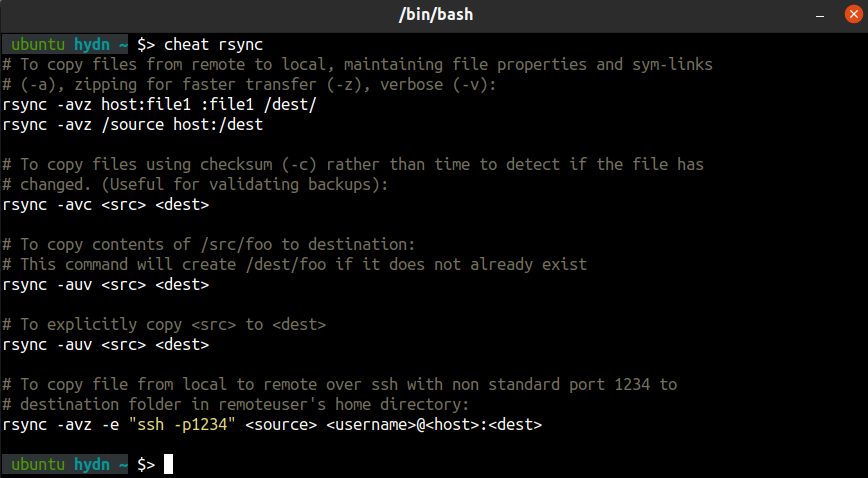
cheat
Create and view interactive cheatsheets on the command-line.
tldr
A community effort to simplify man pages with practical examples.

bottom
Yet another cross-platform graphical process/system monitor.

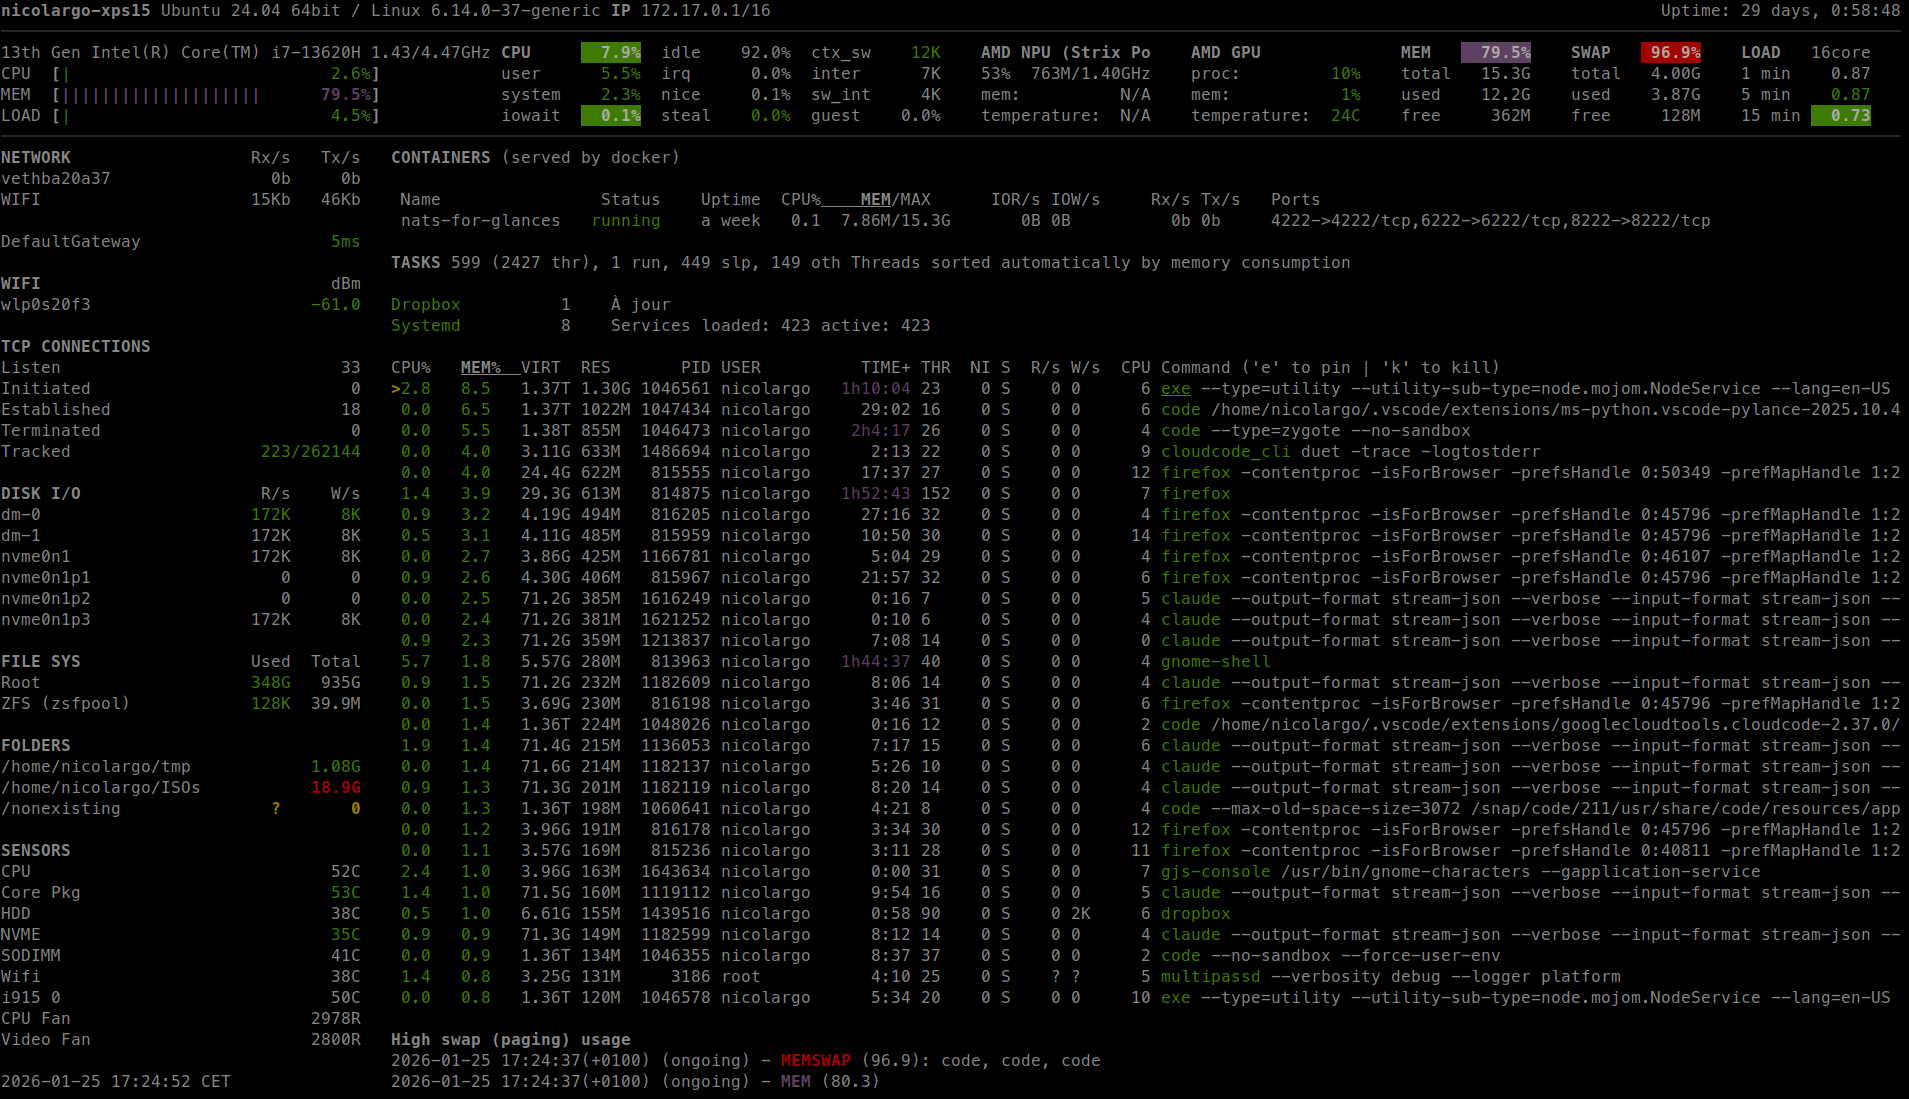
glances
Glances an Eye on your system. A top/htop alternative for GNU/Linux, BSD, Mac OS and Windows operating systems.
gtop
System monitoring dashboard for terminal.
hyperfine
A command-line benchmarking tool.
gping
ping, but with a graph.

procs
A modern replacement for ps written in Rust.

httpie
A modern, user-friendly command-line HTTP client for the API era.

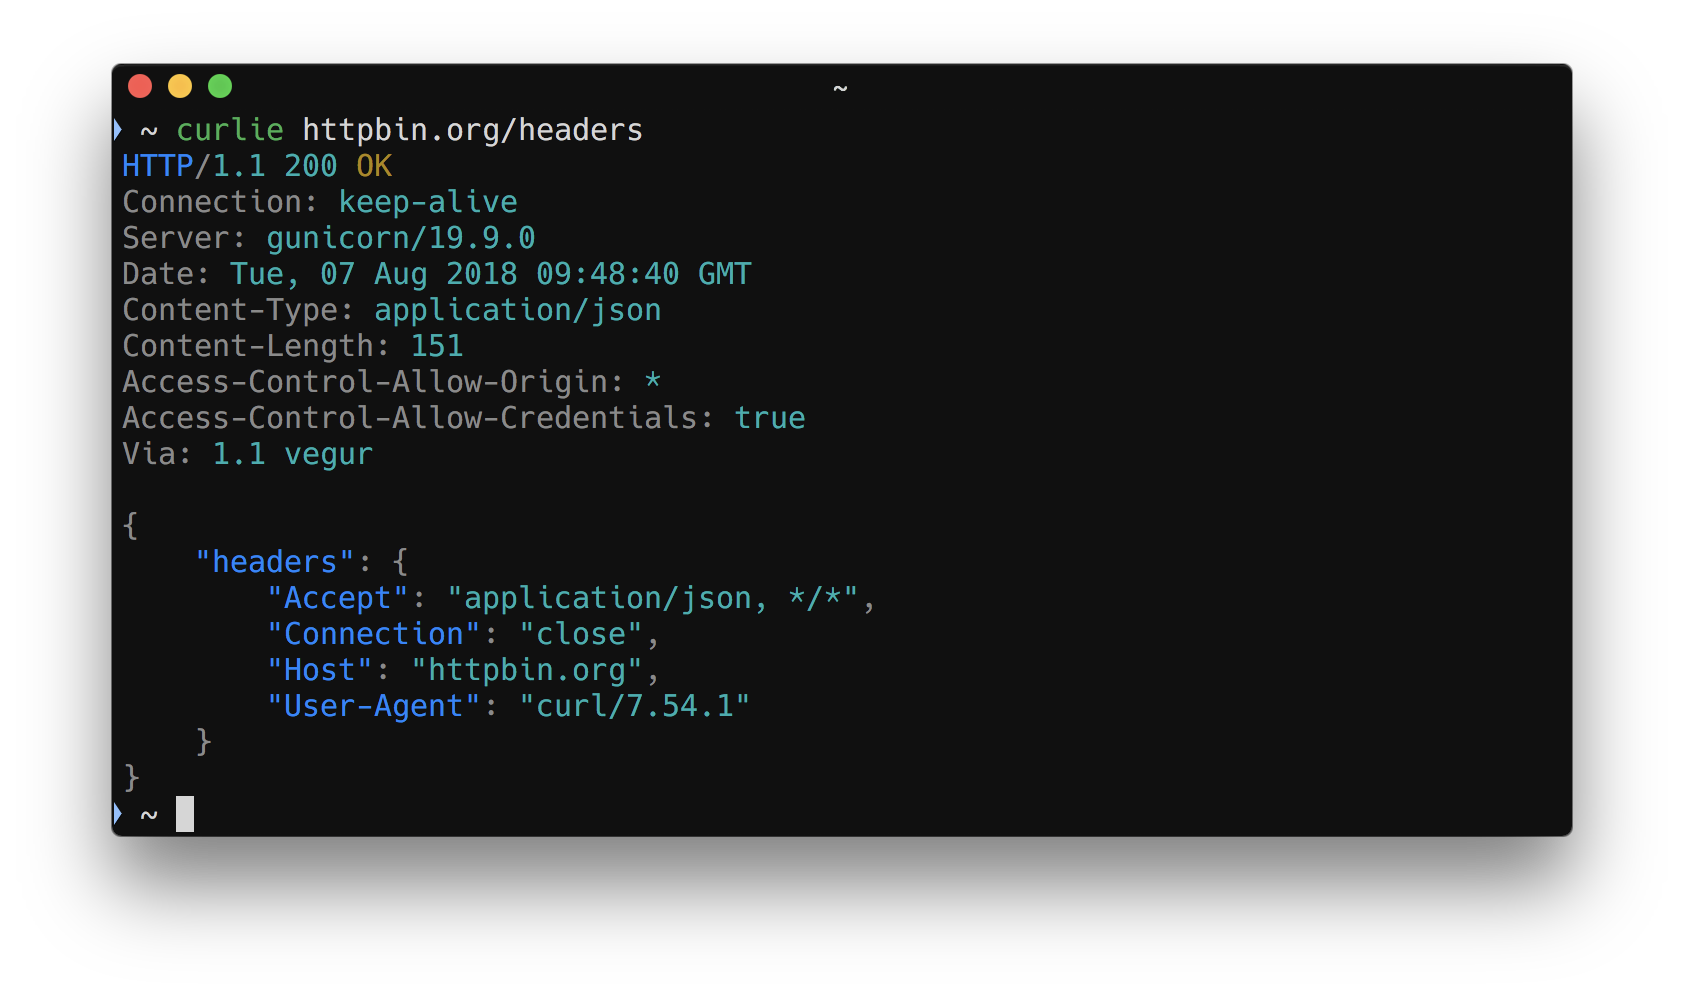
curlie
The power of curl, the ease of use of httpie.
xh
A friendly and fast tool for sending HTTP requests. It reimplements as much as possible of HTTPie's excellent design, with a focus on improved performance.

zoxide
A smarter cd command inspired by z.

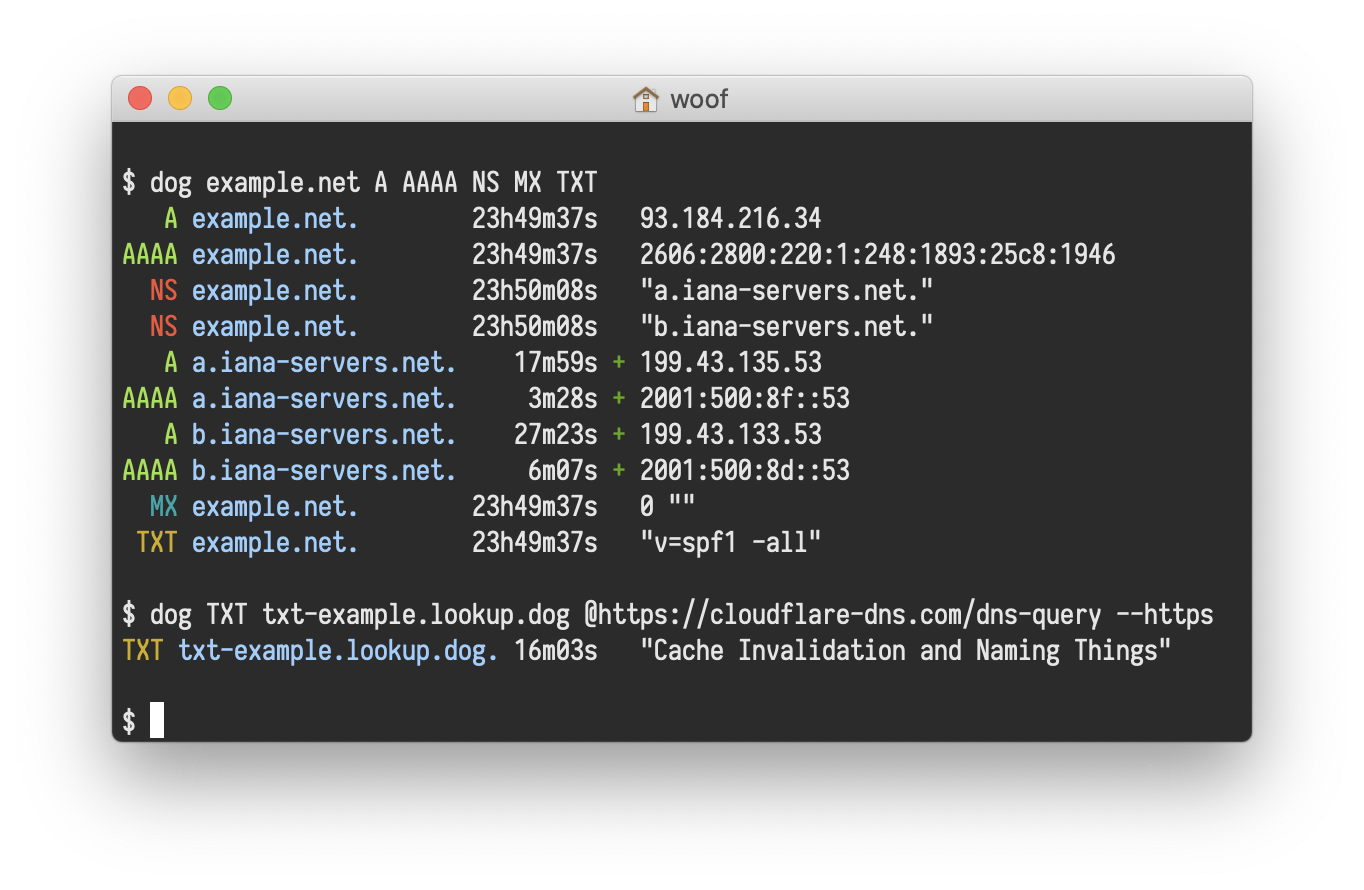
dog
A user-friendly command-line DNS client. dig on steroids
Oneliners
Oneliner, textual input to the command-line of an operating system shell that performs some function in just one line of input. This need to be done with “|”. For advanced usage, please check this
FASTA format
The original FASTA/Pearson format is described in the documentation for the FASTA suite of programs. It can be downloaded with any free distribution of FASTA (see fasta20.doc, fastaVN.doc or fastaVN.me—where VN is the Version Number).
The first line in a FASTA file started either with a “>” (greater-than; Right angle braket) symbol or, less frequently, a “;” (semicolon) was taken as a comment. Subsequent lines starting with a semicolon would be ignored by software. Since the only comment used was the first, it quickly became used to hold a summary description of the sequence, often starting with a unique library accession number, and with time it has become commonplace to always use “>” for the first line and to not use “;” comments (which would otherwise be ignored).
Following the initial line (used for a unique description of the sequence) is the actual sequence itself in standard one-letter character string. Anything other than a valid character would be ignored (including spaces, tabulators, asterisks, etc…). Originally it was also common to end the sequence with an “*” (asterisk) character (in analogy with use in PIR formatted sequences) and, for the same reason, to leave a blank line between the description and the sequence.
Description line
The description line (defline) or header/identifier line, which begins with ‘>’, gives a name and/or a unique identifier for the sequence, and may also contain additional information. In a deprecated practice, the header line sometimes contained more than one header, separated by a ^A (Control-A) character. In the original Pearson FASTA format, one or more comments, distinguished by a semi-colon at the beginning of the line, may occur after the header. Some databases and bioinformatics applications do not recognize these comments and follow the NCBI FASTA specification.
FASTA file handling with command line.
Please check one fasta file
$ ls ATH_cDNA_sequences_20101108.fas
what is GI and GB?
Collect GI
How can I collect GI from FASTA description line?
Please use grep cut to find number.
Sequence redundancy
Does GI have any redundancy? Please use
grepwcdiffto solve.
Split fasta
awk '/^>/{f=++d".fasta"} {print > f}' ATH_cDNA_sequences_20101108.fas
Merge fasta
    cat 1.fasta 2.fasta 3.fasta >> myfasta.fasta
    cat ?.fasta
    cat ??.fasta
Search fasta
    grep -n  --color "GAATTC" ATH_cDNA_sequences_20101108.fas
    grep -n  --color -E 'GAA?TTC' ATH_cDNA_sequences_20101108.fas
Regular Expression
A regular expression is a pattern that the regular expression engine attempts to match in input text. A pattern consists of one or more character literals, operators, or constructs. Please play this
GFF file
The GFF (General Feature Format) format consists of one line per feature, each containing 9 columns of data, plus optional track definition lines. The following documentation is based on the Version 3 (http://gmod.org/wiki/GFF3) specifications.
Please download below file
http://www.informatics.jax.org/downloads/mgigff3/MGI.gff3.gz
What is .gz ?
file MGI.gff3.gz
Check file with less or cat
less ** Q**
cat Ctrl+C can be used to stop any command in terminal safely.
GFF3 file format
- Fields must be tab-separated. Also, all but the final field in each feature line must contain a value; “empty” columns should be denoted with a ‘.’
- seqid - name of the chromosome or scaffold; chromosome names can be given with or without the ‘chr’ prefix. Important note: the seq ID must be one used within Ensembl, i.e. a standard chromosome name or an
- source - name of the program that generated this feature, or the data source (database or project name)
- type - type of feature. Must be a term or accession from the SOFA sequence ontology
- start - Start position of the feature, with sequence numbering starting at 1.
- end - End position of the feature, with sequence numbering starting at 1.
- score - A floating point value.
- strand - defined as + (forward) or - (reverse).
- phase - One of ‘0’, ‘1’ or ‘2’. ‘0’ indicates that the first base of the feature is the first base of a codon, ‘1’ that the second base is the first base of a codon, and so on.. attributes - A semicolon-separated list of tag-value pairs, providing additional information about each feature. Some of these tags are predefined, e.g. ID, Name, Alias, Parent - see the GFF documentation for more details.
Returns all lines on Chr 10 between 5.2MB and 5.45MB in MGI.gff3. (assumes) chromosome in column 1 and position in column 4:
    cat MGI.gff3 | awk '$1=="10"' | awk '$4>=5200000' | awk '$4<=5450000'

    cat MGI.gff3 | awk '$1=="10"' | awk '$4>=5200000' | awk '$4<=5450000' |  grep mRNA

    cat MGI.gff3 | awk '$1=="10"' | awk '$4>=5200000' | awk '$4<=5450000' |  grep mRNA | awk '{print $0,$5-$4}'
Returns specific lines
    sed -n '1,10p' MGI.gff3

    sed -n '52p' MGI.gff3
Time and again we are surprised by just how many applications it has, and how frequently problems can be solved by sorting, collapsing identical values, then resorting by the collapsed counts. The skill of using Unix is not just that of understanding the commands themselves. It is more about recognizing when a pattern, such as the one that we show above, is the solution to the problem that you wish to solve. The easiest way to learn to apply these patterns is by looking at how others solve problems, then adapting it to your needs.
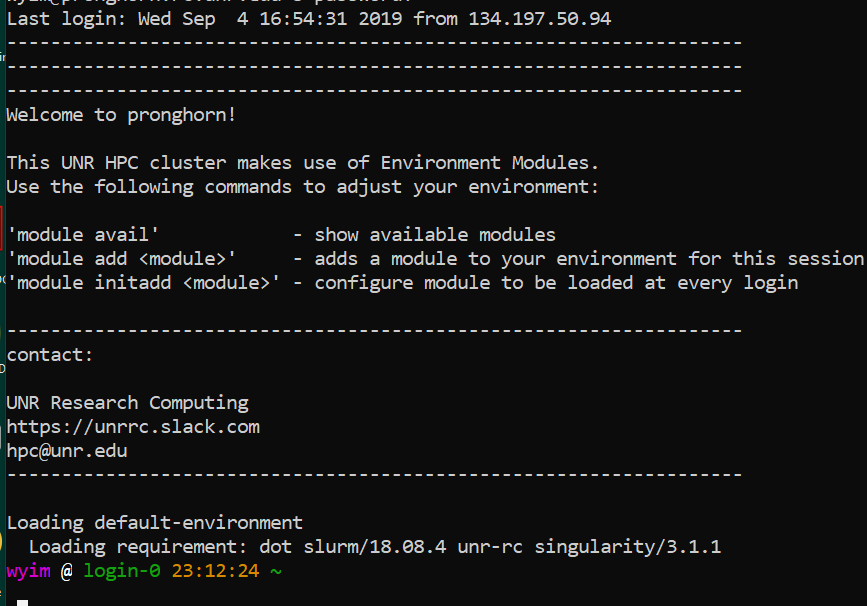
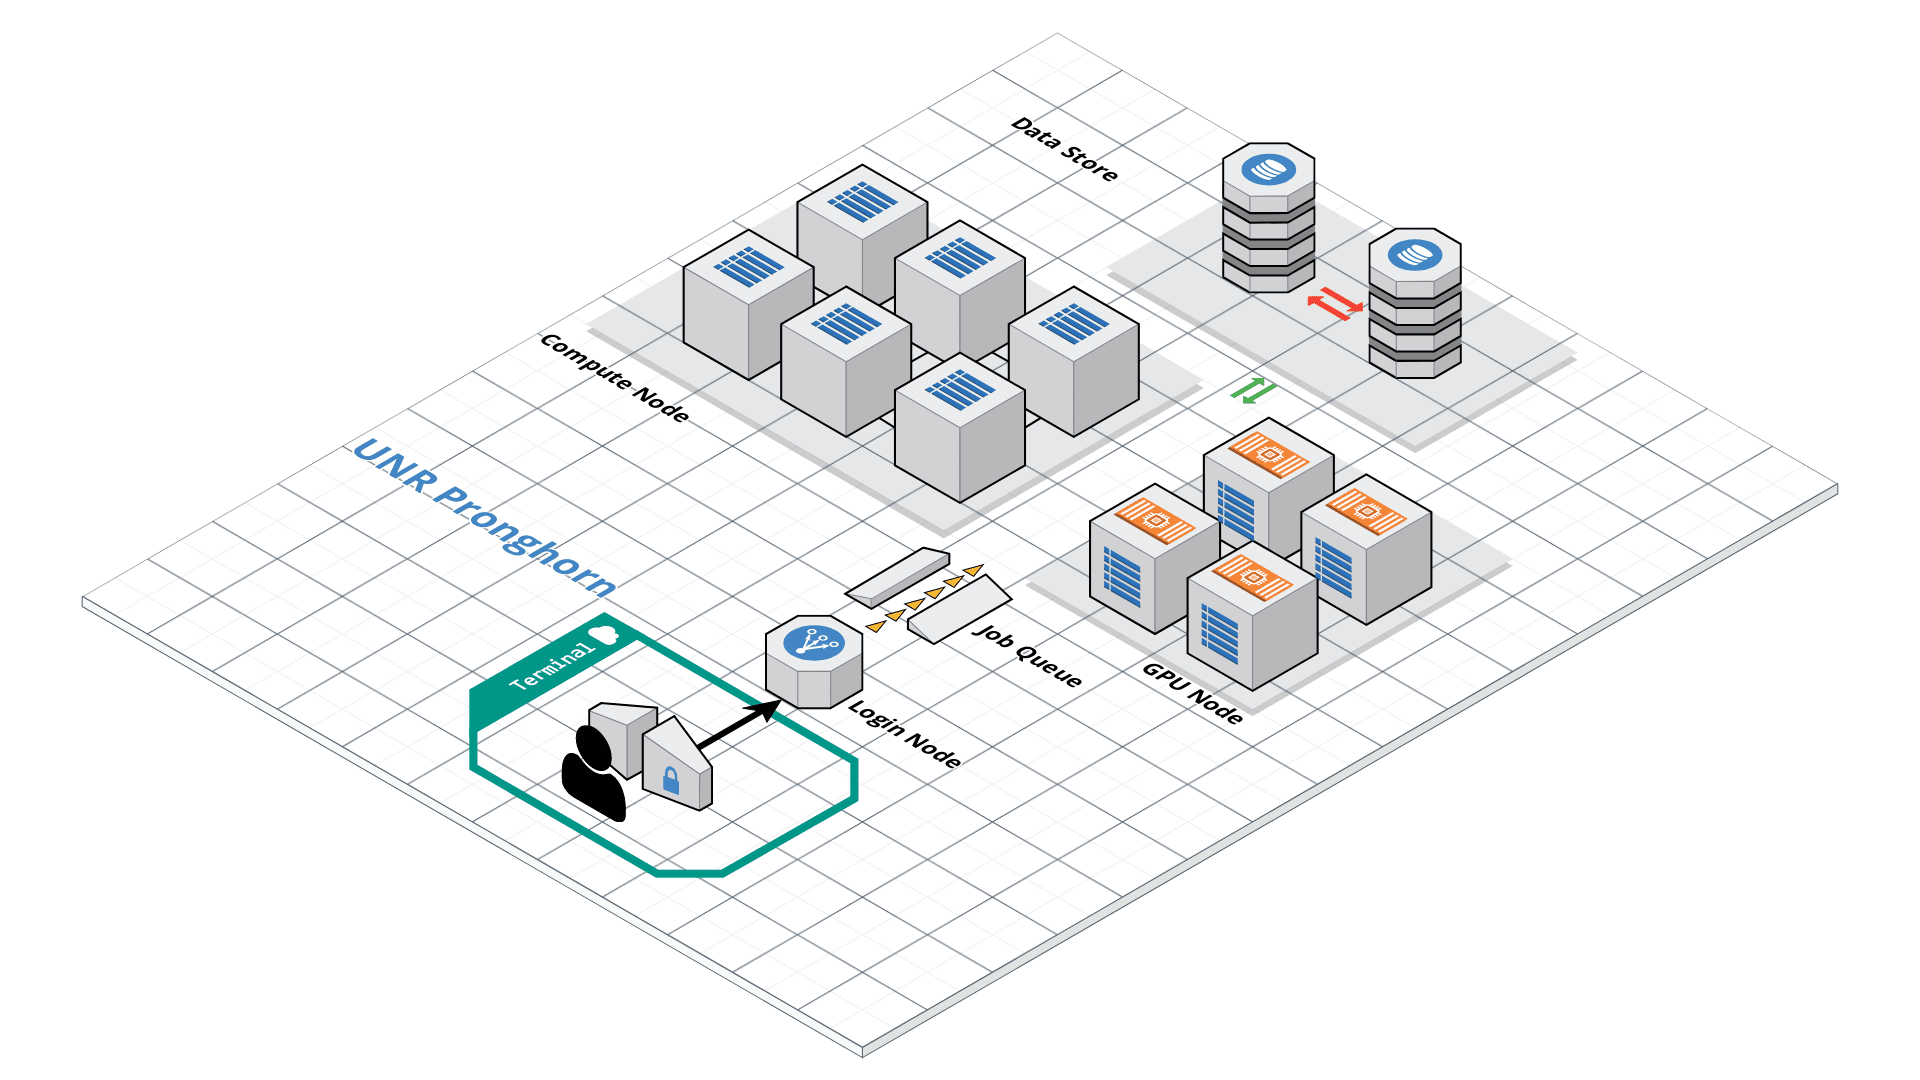
HPC and Cloud
This exercise mainly deals with using HPC clusters for large scale data (Next Generation Sequencing analysis, Genome annotation, evolutionary studies etc.). These clusters have several processors with large amounts of RAM (compared to typical desktop/laptop), which makes it ideal for running programs that are computationally intensive. The operating system of these clusters are primarily UNIX and are mainly operated via command line. All the commands that you have learned in the previous exercises can be used on HPC.
SSH
The ssh command is pre-installed. It means Secure Shell.
ssh <YOURID>@pronghorn.rc.unr.edu

- There are a number of ways to transfer data to and from HPC clusters. Which you should use depends on several factors, including the ease of use for you personally, connection speed and bandwidth, and the size and number of files which you intend to transfer. Most common options include scp, rsync (command line) and SCP and SFTP clients (GUI). scp (secure copy) is a simple way of transferring files between two machines that use the SSH (Secure SHell) protocol. You may use scp to connect to any system where you have SSH (login) access. scp is available as a protocol choice in some graphical file transfer programs and also as a command line program on most Linux, UNIX, and Mac OS X systems. scp can copy single files, but will also recursively copy directory contents if given a directory name. scp can be used as follows:
scp sourcefile username@pronghorn.rc.unr.edu:somedirectory/(to a remote system from local)
scp username@pronghorn.rc.unr.edu:somedirectory/sourcefile destinationfile(from a remote system to local)
scp -r SourceDirectory/ username@pronghorn.rc.unr.edu:somedirectory/(recursive directory copy to a remote system from local)
- rsync is a fast and extraordinarily versatile file copying tool. It can synchronize file trees across local disks, directories or across a network
rsync -avhP path/to/SourceDirectory username@pronghorn.rc.unr.edu:somedirectory/(Synchronize a local directory with the remote server directory)
rsync -avhP username@pronghorn.rc.unr.edu:SourceDirectory/ path/to/Destination/(Synchronize a remote directory with the local directory)
Windows user Desktop location
/mnt/c/Users/[WINDOWS LOGIN ID]/Desktop/
Mac user Desktop location
~/Desktop/
Slurm Quick Start Tutorial
Resource sharing on a supercomputer dedicated to technical and/or scientific computing is often organized by a piece of software called a resource manager or job scheduler. Users submit jobs, which are scheduled and allocated resources (CPU time, memory, etc.) by the resource manager.
Slurm is a resource manager and job scheduler designed to do just that, and much more. It was originally created by people at the Livermore Computing Center, and has grown into a full-fledge open-source software backed up by a large community, commercially supported by the original developers, and installed in many of the Top500 supercomputers.
Gathering information Slurm offers many commands you can use to interact with the system. For instance, the sinfo command gives an overview of the resources offered by the cluster, while the squeue command shows to which jobs those resources are currently allocated.
By default, sinfo lists the partitions that are available. A partition is a set of compute nodes (computers dedicated to… computing) grouped logically. Typical examples include partitions dedicated to batch processing, debugging, post processing, or visualization.
sinfo
sinfo
PARTITION      AVAIL  TIMELIMIT  NODES  STATE NODELIST
cpu-s2-core-0     up 14-00:00:0      2    mix cpu-[8-9]
cpu-s2-core-0     up 14-00:00:0      7  alloc cpu-[1-2,4-6,78-79]
cpu-s2-core-0     up 14-00:00:0     44   idle cpu-[0,3,7,10-47,64,76-77]
cpu-s3-core-0*    up    2:00:00      2    mix cpu-[8-9]
cpu-s3-core-0*    up    2:00:00      7  alloc cpu-[1-2,4-6,78-79]
cpu-s3-core-0*    up    2:00:00     44   idle cpu-[0,3,7,10-47,64,76-77]
gpu-s2-core-0     up 14-00:00:0     11   idle gpu-[0-10]
cpu-s6-test-0     up      15:00      2   idle cpu-[65-66]
cpu-s1-pgl-0      up 14-00:00:0      1    mix cpu-49
cpu-s1-pgl-0      up 14-00:00:0      1  alloc cpu-48
cpu-s1-pgl-0      up 14-00:00:0      2   idle cpu-[50-51]
In the above example, we see two partitions, named batch and debug. The latter is the default partition as it is marked with an asterisk. All nodes of the debug partition are idle, while two of the batch partition are being used.
The sinfo command also lists the time limit (column TIMELIMIT) to which jobs are subject. On every cluster, jobs are limited to a maximum run time, to allow job rotation and let every user a chance to see their job being started. Generally, the larger the cluster, the smaller the maximum allowed time. You can find the details on the cluster page.
You can actually specify precisely what information you would like sinfo to output by using its –format argument. For more details, have a look at the command manpage with man sinfo.
squeue
The squeue command shows the list of jobs which are currently running (they are in the RUNNING state, noted as ‘R’) or waiting for resources (noted as ‘PD’, short for PENDING).
squeue
             JOBID PARTITION     NAME     USER ST       TIME  NODES NODELIST(REASON)
            983204 cpu-s2-co    neb_K jzhang23  R 6-09:05:47      1 cpu-6
            983660 cpu-s2-co   RT3.sl yinghanc  R   12:56:17      1 cpu-9
            983659 cpu-s2-co   RT4.sl yinghanc  R   12:56:21      1 cpu-8
            983068 cpu-s2-co Gd-bound   dcantu  R 7-06:16:01      2 cpu-[78-79]
            983067 cpu-s2-co Gd-unbou   dcantu  R 1-17:41:56      2 cpu-[1-2]
            983472 cpu-s2-co   ub-all   dcantu  R 3-10:05:01      2 cpu-[4-5]
            982604 cpu-s1-pg     wrap     wyim  R 12-14:35:23      1 cpu-49
            983585 cpu-s1-pg     wrap     wyim  R 1-06:28:29      1 cpu-48
            983628 cpu-s1-pg     wrap     wyim  R   13:44:46      1 cpu-49
SBATCH
Now the question is: How do you create a job?
A job consists in two parts: resource requests and job steps. Resource requests consist in a number of CPUs, computing expected duration, amounts of RAM or disk space, etc. Job steps describe tasks that must be done, software which must be run.
The typical way of creating a job is to write a submission script. A submission script is a shell script, e.g. a Bash script, whose comments, if they are prefixed with SBATCH, are understood by Slurm as parameters describing resource requests and other submissions options. You can get the complete list of parameters from the sbatch manpage man sbatch.
Important
The SBATCH directives must appear at the top of the submission file, before any other line except for the very first line which should be the shebang (e.g. #!/bin/bash). The script itself is a job step. Other job steps are created with the srun command. For instance, the following script, hypothetically named submit.sh,
nano submit.sh
#!/bin/bash
#SBATCH --job-name=test
#SBATCH --cpus-per-task=1
#SBATCH --time=10:00
#SBATCH --mem-per-cpu=1g
#SBATCH --mail-type=begin
#SBATCH --mail-type=end
#SBATCH --mail-user=wyim@unr.edu
echo "Hello Pronghorn"
seq 1 80000
would request one CPU for 10 minutes, along with 1g of RAM, in the default queue. When started, the job would run a first job step srun hostname, which will launch the UNIX command hostname on the node on which the requested CPU was allocated. Then, a second job step will start the sleep command. Note that the –job-name parameter allows giving a meaningful name to the job and the –output parameter defines the file to which the output of the job must be sent.
Once the submission script is written properly, you need to submit it to slurm through the sbatch command, which, upon success, responds with the jobid attributed to the job. (The dollar sign below is the shell prompt)
$ chmod 775 submit.sh
$ sbatch submit.sh
sbatch: Submitted batch job 99999999
Yim_basic_setting
bashrc
nano ~/.bashrc
######.bashrc
HISTSIZE=5000
HISTFILESIZE=9000

alias vi='vim'
alias grep='grep --color=auto'
alias egrep='egrep --color=auto'
alias ll='ls -alhg'
alias la='ls -A'
alias du='du -h --max-depth=1'

tty -s && export PS1="\[\033[38;5;164m\]\u\[$(tput sgr0)\]\[\033[38;5;15m\] \[$(tput sgr0)\]\[\033[38;5;231m\]@\[$(tput sgr0)\]\[\033[38;5;15m\] \[$(tput sgr0)\]\[\033[38;5;2m\]\h\[$(tput sgr0)\]\[\033[38;5;15m\] \[$(tput sgr0)\]\[\033[38;5;172m\]\t\[$(tput sgr0)\]\[\033[38;5;15m\] \[$(tput sgr0)\]\[\033[38;5;2m\]\w\[$(tput sgr0)\]\[\033[38;5;15m\]\n \[$(tput sgr0)\]"
Nano RC
nano ~/.nanorc
set nowrap
set softwrap
set const
## Nanorc files
include "/usr/share/nano/nanorc.nanorc"

## C/C++
include "/usr/share/nano/c.nanorc"

## HTML
include "/usr/share/nano/html.nanorc"

## TeX
include "/usr/share/nano/tex.nanorc"

## Quoted emails (under e.g. mutt)
include "/usr/share/nano/mutt.nanorc"

## Patch files
include "/usr/share/nano/patch.nanorc"

## Manpages
include "/usr/share/nano/man.nanorc"

## Groff
include "/usr/share/nano/groff.nanorc"

## Perl
include "/usr/share/nano/perl.nanorc"

## Python
include "/usr/share/nano/python.nanorc"

## Ruby
include "/usr/share/nano/ruby.nanorc"

## Java
include "/usr/share/nano/java.nanorc"

## Assembler
include "/usr/share/nano/asm.nanorc"

## Bourne shell scripts
include "/usr/share/nano/sh.nanorc"

## POV-Ray
include "/usr/share/nano/pov.nanorc"