macOS Command Line Tools Installation
The Command Line Tools (CLT) package is essential for software development and bioinformatics work on macOS. It provides command-line development tools including compilers, linkers, and Make, which are required for building software from source code.
What Are Command Line Tools?
Command Line Tools are a collection of development resources provided by Apple that enable UNIX-style development on macOS. These tools are required for:
- Compiling software from source code
- Installing programming languages and libraries (Python, Ruby, etc.)
- Using package managers like Homebrew
- Running bioinformatics software and pipelines
- Working with version control systems like Git
Supported macOS Versions
This guide works for all modern macOS versions including:
- macOS Sequoia (15.x)
- macOS Sonoma (14.x)
- macOS Ventura (13.x)
- macOS Monterey (12.x)
- macOS Big Sur (11.x)
- macOS Catalina (10.15) and earlier
System Requirements
- macOS 10.9 or later
- Administrator access on your Mac
- At least 2-3 GB of free disk space
- Active internet connection for downloading
Quick Installation (Recommended)
This is the simplest and recommended method for all modern macOS versions.
Step 1: Open Terminal
The easiest way to open Terminal is via Spotlight:
- Press
Command (⌘) + Spaceto open Spotlight Search - Type “Terminal”
- Press
Returnto launch Terminal

Step 2: Install Command Line Tools
In the Terminal window, copy and paste the following command and press Return:
xcode-select --install
A popup window will appear asking if you want to install the Command Line Tools.
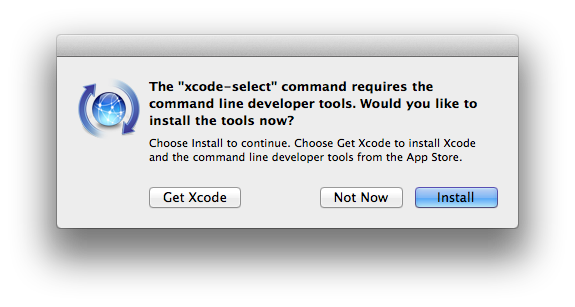
Click Install to proceed.
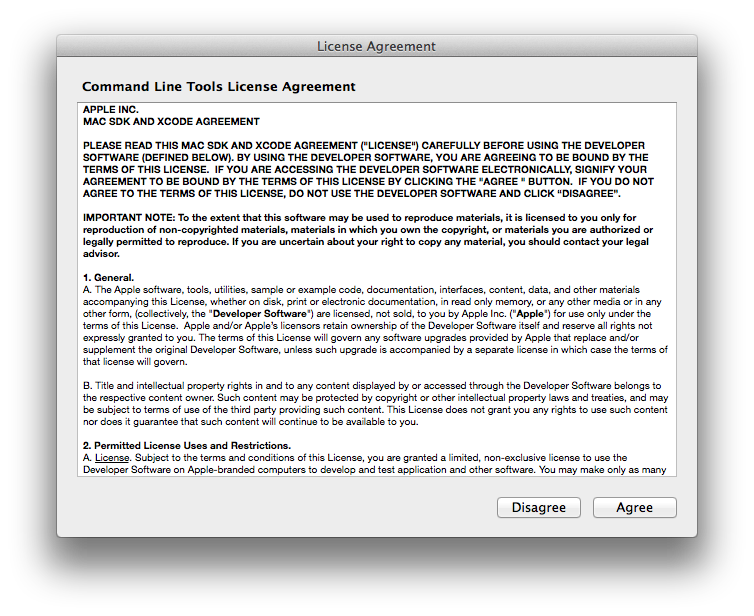
Step 3: Accept License Agreement
Read and click Agree when the License Agreement appears:
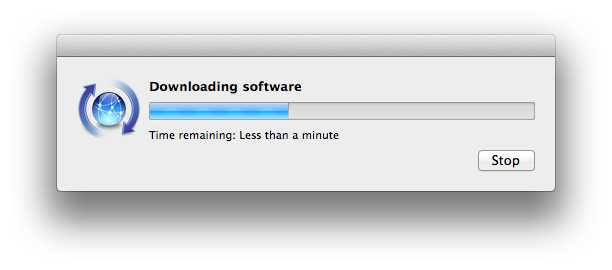
Step 4: Wait for Installation
Your Mac will download and install the Command Line Tools. This may take several minutes depending on your internet connection.
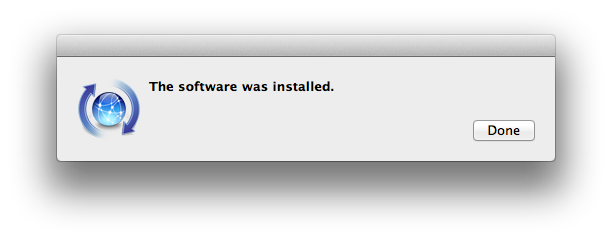
Step 5: Complete Installation
Once installation is complete, click Done.
Verify Installation
To verify that the Command Line Tools are installed correctly, open Terminal and run:
xcode-select -p
You should see output similar to:
/Library/Developer/CommandLineTools
You can also check the version:
xcode-select --version
Troubleshooting
Command Line Tools Already Installed
If you see a message saying “command line tools are already installed”, then you’re all set! No further action needed.
Installation Failed
If the installation fails:
- Make sure your macOS is up to date (go to System Settings > General > Software Update)
- Ensure you have enough disk space (at least 2-3 GB free)
- Try running the command again:
xcode-select --install
Reset Command Line Tools
If you need to reinstall or reset the Command Line Tools:
sudo rm -rf /Library/Developer/CommandLineTools
xcode-select --install
Alternative: Install via Xcode (Optional)
If you prefer to install the full Xcode application (which includes Command Line Tools):
- Open the App Store application
- Search for “Xcode”
- Click Get or Install
- Wait for the large download to complete (Xcode is several GB)
- Open Xcode and accept any additional components it wants to install
Note: Installing full Xcode is not required for this course. The standalone Command Line Tools are sufficient for all bioinformatics work we’ll be doing.
Installation Methods
There are three ways to install Command Line Tools on macOS:
Method 1: Command Line Installation (Recommended)
This is the fastest and simplest method, as described in the Quick Installation section above.
Advantages:
- Smallest download size (~200-500 MB depending on macOS version)
- Fastest installation
- Only installs what you need for development
- Recommended by Apple for command-line only development
Method 2: Install via Xcode (Full IDE)
Install the complete Xcode application from the Mac App Store.
Advantages:
- Includes graphical development tools
- Required if you plan to develop iOS/macOS applications
- Includes iOS Simulator and additional SDKs
Disadvantages:
- Very large download (10+ GB)
- Takes significantly longer to install
- Not necessary for bioinformatics work
Method 3: Manual Download from Apple Developer
Download directly from developer.apple.com (requires free Apple ID):
- Sign in with your Apple ID
- Search for “Command Line Tools”
- Download the version matching your macOS
- Install the downloaded .dmg file
When to use this method:
- When
xcode-select --installfails - For offline installation
- For specific older versions
What’s Included?
The Command Line Tools package includes:
Core Development Tools
- Compilers: Clang, GCC, and related tools for C, C++, and Objective-C
- Build Systems: Make, CMake support, and other build utilities
- Linkers and Libraries: Dynamic library tools and system libraries
- Debuggers: LLDB and GDB for debugging programs
Version Control
- Git: Complete Git version control system
- Git LFS: Large File Storage support
- SVN: Subversion client (legacy support)
Development Utilities
- Headers: System headers for macOS frameworks
- SDKs: Software Development Kits for macOS
- Package Config: pkg-config for managing compile/link flags
- Development Scripts: Various UNIX development utilities
Additional Tools
- Python: System Python (note: may vary by macOS version)
- Perl: Perl interpreter
- Shell Utilities: Enhanced bash, zsh, and other shell tools
- Text Processing: awk, sed, and other text utilities
Updating Command Line Tools
Apple periodically releases updates to Command Line Tools. To check for and install updates:
Check for Updates via System Settings
- Go to System Settings (or System Preferences on older macOS)
- Click General > Software Update
- If Command Line Tools updates are available, they will appear here
Check Current Version
pkgutil --pkg-info=com.apple.pkg.CLTools_Executables
Force Update Check
softwareupdate --list
Reinstall Command Line Tools
If you need to reinstall:
sudo rm -rf /Library/Developer/CommandLineTools
xcode-select --install
Common Issues and Solutions
Issue: “xcode-select: error: command line tools are already installed”
This means the tools are already installed. To verify or reinstall:
xcode-select --print-path
If you need to reinstall anyway:
sudo rm -rf $(xcode-select --print-path)
xcode-select --install
Issue: “Can’t install the software because it is not currently available”
Solutions:
- Update macOS to the latest version
- Try downloading manually from developer.apple.com
- Clear software update cache:
sudo rm -rf /Library/Developer/CommandLineTools
sudo rm -rf /Library/Caches/com.apple.dt.Xcode
xcode-select --install
Issue: Git or other tools not found after installation
Reset the command line tools path:
sudo xcode-select --switch /Library/Developer/CommandLineTools
sudo xcode-select --reset
Why Do Bioinformatics Students Need This?
Command Line Tools are essential for bioinformatics because:
- Software Compilation: Many bioinformatics tools need to be compiled from source
- Package Managers: Homebrew and other package managers require CLT to install bioinformatics software
- Python/R Packages: Many packages require compilation of C/C++ extensions
- Git Integration: Version control is essential for managing scripts and analyses
- Pipeline Development: Building custom analysis pipelines requires development tools
Testing Your Installation
After installation, test that common tools are available:
# Test compiler
gcc --version

# Test make
make --version

# Test git
git --version

# Test Python (if included)
python3 --version

# List all installed tools location
xcode-select -p
Expected output should show version numbers for each tool without errors.
Important Notes
- Do not delete
/Library/Developer/CommandLineToolsunless you plan to reinstall - Command Line Tools are separate from Xcode - you don’t need both
- Updates are free and recommended for security and compatibility
- The tools work offline once installed
- Installation requires administrator privileges on your Mac
Additional Resources
- Official Apple Developer Documentation
- Apple Developer Downloads
- Mac Terminal Basics
- Xcode Command Line Tools FAQ
Ready to proceed? Once you have the Command Line Tools installed, you can return to the Setup page to continue preparing your system for the course.